All posts by HealthyLife

HealthyLife is a part of www.WeRIndia.com, an all India – centric website (https://healthylife.werindia.com) and is solely owned and operated by WeRIndia.com. It is a Indian nutritional portal providing educational articles.This nutritional port was launched on February 5th, 2015.
MEMORY BOOSTER: GOTU KOLA (ONDELAGA, TIMIRE) DISHES

Memory Booster: Gotu Kola (Ondelaga ,Timire) Dishes

“GOTU KOLA IS REGARDED AS THE MOST SPIRITUAL OF ALL HERBS PROBABLY BECAUSE OF ITS DEVINE CHARACTERS”

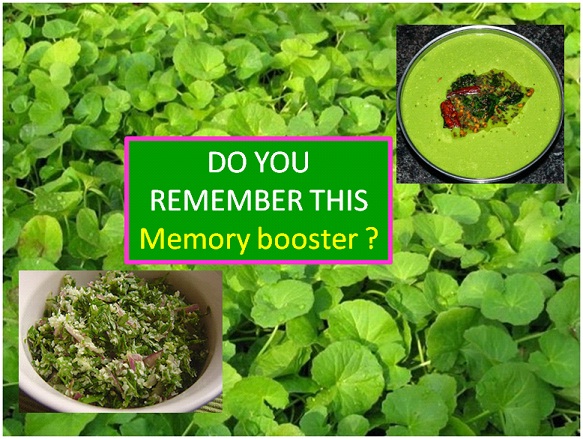
If you are in India, probably you will see a runner plant often on roadsides and paddy fields or in farms that have beautiful heart shaped leaves with tender stems. These plants are known as Centella asiatica, or as gotu kola, is an annual herb native to India, Australia and Asia. Its leaves are eaten as a vegetable and it is an important herb in the traditional medicine systems of these places. Research has revealed support for several of Centella asiatica’s purported health benefits. Gotu Kola is a rejuvenating nervine and recommended for nervous disorders, epilepsy, senility and premature aging. As a brain tonic, it is said to aid intelligence and memory. Grandmothers and native herbalists often suggest to young parents to feed gotu kola leaves to their kids to improve kids memory. It also, strengthens the adrenal glands and cleanses the blood to treat skin impurities. One of its constituents, asiaticoside, works to stimulate skin repair and strengthen skin, hair, nails and connective tissue. In India, Gotu kola is regarded as perhaps the most spiritual of all herbs. Growing in some areas of the Himalayas, gotu kola is used by yogis to improve meditation.

Here are two easy Gotu kola recipes:

1) Gotu kola salad:

Ingredients:- 

  • Centella bunch or gotu kola : 1 bunch
  • Shallots chopped : 5-6
  • Green chilli : 3
  • Grated coconut : 2 Tbs
  • Lime Juice: Half Tsp
  • Freshly ground pepper: Half Tsp.
  • Salt: For taste

Method:

Wash and finely cut the gotu kola. Remove any roots or basal part that has root hairs.
Chop the shallots and green chili.
In a medium bowl, mix gotu kola, onion, green chili, grated coconut, pepper and salt together.
Lastly add limejuice and mix again.
Serve this salad before meal or as a side dish with rice, chapatti or rotis.

2) Gotu kola chutney:

Ingredients:

  • Gotu kola Leaves : 1 bunch
  • Coconut : 1 Cup
  • Urd daal : 1 Tsp
  • Pepper: 1/2 Tsp
  • Tamarind : 1 Small Marble size
  • Asafetida : a pinch
  • Salt : as needed
  • Cut raw mangoes : Half cup: Optional (if available in the season)

Method :

  • Slightly dry fry the gotu kola leaves, pepper and urd daal.
  • Allow it to cool
  • In a wet grinder add tamarind, asafoetida and fried ingredients along with grated coconut. Grind to fine paste.
  • Add salt and mix well.
  • In a frying pan for seasoning heat little oil add mustard, red chilli and curry leaves. Before serving, add seasoning to the chutney.
  • Serve chutney with, idli, dosa, white rice or as a side dish.
  • One can add curd /yogurt to this chutney and have as raita with pulav and other spicy rice dishes.

Reference:

https://healthylife.werindia.com/your-road-to-healthy-life/gotu-kola-centella-asiatica
Recipe: www.werindia.com


Author: HealthyLife | Posted on: November 16, 2017
« »
« »

Recommended for you

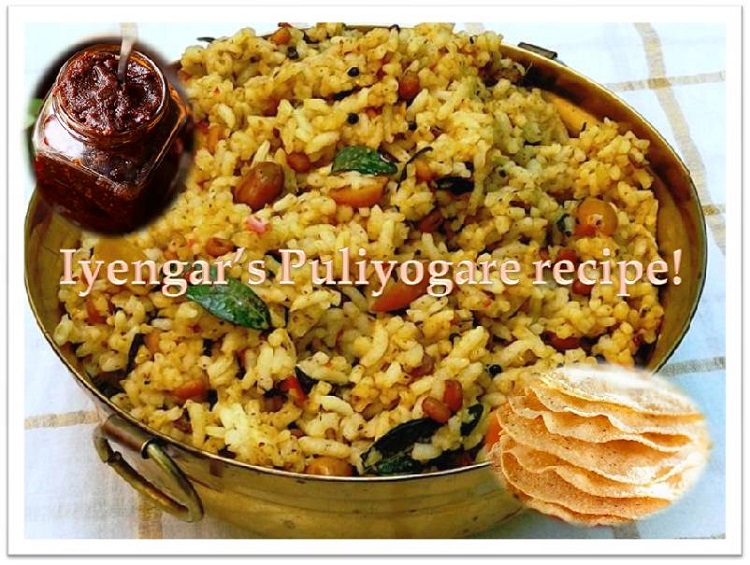
Traditional Iyengar's Puliyogare Recipe

Traditional Iyengar’s Puliyogare Recipe

Puliyogare is famous dish made of tamarind, jaggery and spices.

It is a delicacy of  South Indian states – Karnataka, Andhra Pradesh, Tamil Nadu & Kerala. It is a tangy-spicy South Indian Rice variety, which is known for its long shelf life and great travel food.

Many temples offer tamarind rice as “prasadam” to devotees. It is an integral part of festive menus and wedding feasts.

Because of tamarind and balanced spices the taste and aroma of tamarind makes it one of the most popular breakfast, lunch or dinner item.

The other names for this dish is puliodharai, pulihaara, pulisaadam or tamarind rice.

 Ingredients for puliyogare paste:

1. Cumin – 1 Tbs

2. Fenugreek seeds – 1 Tbs

3. Black pepper – 1 Tbs

4. Mustard – 1/2 tsp

5. Coriander seeds – 3-4 Tbs

6. Red chilies – 6-7 (Guntur variety is good!)

7. Byadgi chilies – 10 – 12

8. Asofietida /hing– 1/2 tsp

9. Jaggery – 3/4 cup crushed

10. Tamarind – 1 cup

11. Salt to taste

Method

1. Soak tamarind in 2 cups of hot water  for 10 – 15 min

2. Except mustard dry roast all the above ingredients separately.

3. Add mustard seeds to the roasted ingredients and allow ingredients to cool

4. Using a dry grinder prepare spice powder of the ingredients.

5. Squeeze the soaked tamarind and collect the thick water.

6. On medium flame heat tamarind thick water and let the consistency become thick. Now add turmeric powder, jaggery and salt. Bring the mixture to boil, stir until jaggery dissolves in it.

7. Now add the spice powder combine it with the mixture, boil it for 5 min on a low flame and turn off the flame.

Preparation of puliyogare: For 2 cups of rice

For seasoning –

1. Black sesame – 1/2 cup

2. Byadagi chilies – 4-5

3. Fresh curry leaves – 1 bunch

4. Urad daal-1 tsp

5. Chenna daal-1 tsp

6. Peanuts – 1/2 cup

7. Mustard – 1 tsp

8. Asafoetida/hing– 1/4 tsp

9. Grated dry coconut (copra) – 1 cup

10. Turmeric powder – 1/2 tsp

11. Oil – 1 cup

12. Salt to taste

Method :

1. Dry roast black sesame and after cooling prepare coarse powder.

2. In a pan take oil for tempering and on medium flame heat the oil. Add mustard, allow it to splutter and add curry leaves, dry chilies,

3. Now add peanuts fry until it turns to golden brown and crisp

4. Add coarsely powdered sesame powder into it, stir for a while in oil

5. Add grated copra fry it for a minute.

6. Remove pan from the flame and add tamarind mixture and mix properly.

7. Prepare rice (1 cup rice add 2 cups of water). Rice should not be sticky. Use either Sona massori or Basmati rice – both are good for puliyogare.

8. Once rice is ready spread it in a wider vessel. Add puliyogare paste and mix well. If needed add little oil.

.

Garnish with chopped coriander leaves and serve  puliyogare hot.

*You can store puliyogare paste (gojju) for about 15 days outside. For long term storage transfer the paste into an air tight container and store in refrigerator.


Author: HealthyLife | Posted on: November 15, 2017
« »
« »

Recommended for you

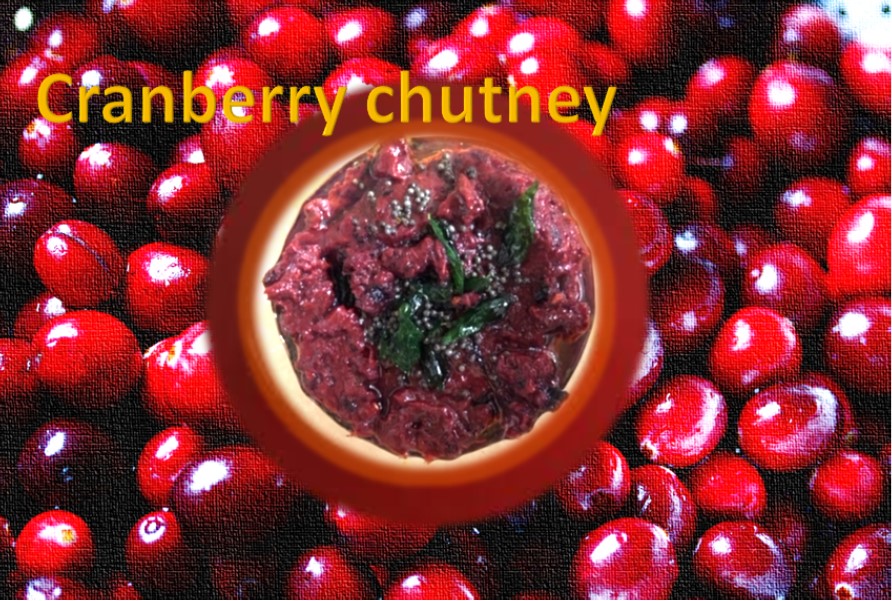
Cranberry Chutney

Cranberry chutney

Being a versatile fruit, cranberry is used both for food as well as medicinal purposes. Native to North America, cranberry is cultivated for its tremendous applications. It has more antioxidants than many other fruits and vegetables. Rich in Vitamin C and salicylic acid.

Cranberry juice is a popular remedy for urinary tract infections. It is believed to have antitumor property too.

Other benefits of consuming cranberry is, preventing tooth decay and respiratory infections, strengthening of bone and muscle, reduces cold, prevents kidney stone development.

With these, it is also known to emulsify fat deposits and helps in weight loss and obesity.

Cranberry jam, juice, sauce, salsa, jelly, relish, syrup, pancakes, granola, smoothie, ketchup are some of the popular dishes one can make using cranberry.

Another recipe you can add to this list is cranberry chutney! Try this easy recipe in this cranberry season.

Ingredients

  • Cranberry – 3 cups
  • Urad daal – 2 tsp
  • Cumin – ½ tsp
  • Red chilli – 8
  • Asafetida – A pinch
  • Mustard – 1 tsp
  • Curry leaves – 1 string
  • Turmeric powder – ½ tsp
  • Jaggery – One small lemon size or brown sugar -1/2 cup
  • Salt – As per your taste

Preparation:

  • Wash cranberry and transfer on a paper towel to remove excess water
  • Heat 2 to 3 tsp oil in a deep pan and add red chilli, cumin and urad daal. Once all these items fried add cranberry and continue frying. Fry cranberry in the oil and allow it to cook – Cranberry cooks very fast (in less than 10 mins).
  • In a blender/grinder, add above fried mix. Add jaggery, salt and asafetida and grind to a paste.
  • Remove grinded chutney and taste. If needed add salt and jaggery or brown sugar. Cranberry is very sour. To remove sourness you need both salt and jaggery.
  • Season chutney with mustard and curry leaves.
  • After cooling, you can serve cranberry chutney as a side dish for rice item or with chapatti, roti or parata. One can apply it on bread toast. For longtime use store cranberry chutney in an airtight container.

Reference: www.werindia.com


Author: HealthyLife | Posted on: November 7, 2017
« »
« »

Recommended for you

Kitchen hacks one should know

Kitchen hacks one should know

Some kitchen hacks are really useful and makes our kitchen work easy.

  1. If you are using cutting board to cut vegetables and cutting board is moving chances of cutting your fingers is always there. Don’t worry, place a damp paper towel under the cutting board and it is secured in one place
  2. To peel ginger skin, if you don’t have a peeler or misplaced it use a spoon instead of knife.
  3. To peel garlic cloves, take whole garlic and separate cloves by putting pressure. Transfer the cloves in a bottle, put the lid and shake well.
  4. Other way to peel garlic clove is, keep cloves in a microwave container and warm it for 15 secs. Now it is easy to peel the garlic skin.
  5. If butter is too hard and have difficulty in spreading on toast all you need to do is, take a knife and glass of hot water. Dip knife in the water and cut the butter.
  6. If the bread or bun that you bought from store becomes hard and not yet expired, take the bread and cover with a wet paper towel. Bake for 5 minutes. Bread or bun, it becomes soft. Alternatively you can keep in microwave for few seconds.
  7. To keep cut fruits from browning, mix lemon juice with honey and sprinkle on the cut fruits.
  8. To remove seeds from cucumber and squash fruit, use a ice-cream scooper.
  9. If you find it hard to peel citrus fruit skin, microwave fruit for just few seconds and peeling of skin becomes easy!
  10. To stop onions hurting and tearing your eyes, after peeling keep onion for few minutes in freezer. Or hold a bread piece in your mouth. It absorbs Sulfur from onion.
  11. If you cannot spread the hard butter, then use a grater to grate it like cheese and spread it on the bread
  12. If honey in the kitchen is crystallized, take a bowl of water and boil it. Place the honey container in the hot water bowl – you will get de-crystallized honey.
  13. To keep left over cakes for few more days, keep sliced breads with cake. Bread keeps the cake moisture for sometime.
  14. To get clear ice cubes, boil and cool the water before putting in ice cube maker.
  15. To avoid mess while boiling liquids or broth in a pot, place a wooden spoon across on top of the pot. Being a poor conductor of heat, wooden peace stops over boiling and the mess.

Online Grandma: Grandma’s tips

Image credit: Photo by Kaboompics .com from Pexels (Free for commercial use)


Author: HealthyLife | Posted on: November 3, 2017
« »
« »

Recommended for you

Bound Angle Pose

Bound Angle Pose

Bound angle pose or Baddha konasana is a beginner’s pose and helps to improve flexibility.  It helps in improving flexibility of thighs, knees and groin area.

Performing this pose helps in increasing flexibility and makes it easy to get into other yoga poses easily, especially seated poses.

This pose helps in stimulating digestive and abdominal organs, ovaries, bladder, kidney and prostrate glands.

It helps in relieving anxiety, depression and fatigue. It also releases the discomfort during menstrual cycle and reduces sciatica pain –www.healthylife.werindia.com

Sanskrit: Baddha Konasana (BAH-dah cone-AHS-anah) baddha = bound kona = angle

BENEFITS

  • Lengthens and releases adductor muscles of the groin
  • Stretches the low back and thighs
  • Improves external rotation of the hips
  • Strengthens the hip flexors and abdominals
  • Stimulates the abdominal organs and digestive system
  • Relieves system of menstruation and menopause

CONTRAINDICATIONS

  • Hip pathologies
  • Ankle pathologies
  • Low back pathologies (avoid rounding)
  • Knee, hip, or groin injury

HOW TO

  1. In a seated position, ground down into your sitting bones and draw the soles of your feet together. Bring your heels in toward your pelvis and allow the knees to relax out to the sides.
  2. Clasp your fingers around your toes on an inhalation. Begin to engage your core to lift the torso and press your chest forward, allowing your spine to lengthen.
  3. As you exhale, bend forward through the hips while maintaining a long spine, and find your edge.
  4. Inhale and allow your spine to lengthen by lifting out of your torso and drawing your shoulder blades down the back.
  5. Exhale, draw the abdominals in, and dissolve further forward, drawing the chest toward the toes.
  6. Hold this pose for 5-10 slow breaths.
  7. To exit, inhale and elongate the spine while returning to an upright position. Exhale and release the toes, feeling free to extend the knees if needed.

MODIFY OR REPLACE

  • Extend the feet further out in front of you.
  • Utilize blocks under the knees for support, or tuck you mat or blanket under the sitting bones.

SEQUENCING TIPS

Before:

  • Balasana (Child’s pose)
  • Bakasana (Crow pose)
  • Upavistha Konasana A (Wide-Angle Seated Forward Bend A)
  • Upavistha Konasana B (Wide-Angle Seated Forward Bend B)

After:

  • Supta Baddha Konasana (Reclining Bound Angle)
  • Paschimottanasana (Seated Forward Bend)

TEACHING CUES

  • Keep the upper and lower spine lifted through the torso.
  • Bend forward at the hips, drawing your chest toward your feet.
  • If choosing to round the spine, be cautious of the low back and keep extension in the low spine.
  • On each inhalation, feel your chest lift and spine lengthen. On each exhalation, take a deeper forward fold.

VARIATIONS

To deepen the posture, draw the heels toward the body and bend forward to rest the chest onto the feet.

WATCH OUT FOR

  • Rounding of the low back (maintain a long spine)
  • Hinging from the waist instead of the hips
  • Pressing onto the knees

This article and image published here with permission from www.beyogi.com


Author: HealthyLife | Posted on: November 1, 2017
« »
« »

Recommended for you

Sweet pumpkin Idli

Sweet pumpkin Idli

Sweet pumpkin has a special place in Halloween celebrations.  Carving pumpkins into jack-o’-lanterns is a popular Halloween tradition. Without sweet pumpkins and dishes prepared with sweet pumpkin, Halloween is not enjoyable. Bread, soup, pie – so many varieties of dishes are prepared using pumpkin. This Halloween try a special dish from India. This is similar to traditional idli with pumpkin as the main ingredient. In local language it is called “kadabu” – Sweet pumpkin Idli.

What is in sweet pumpkin that is nutritious?

Sweet pumpkins are low in calories, fat and sodium and are rich in dietary fiber. They provide good amount of Vitamin A, Vitamin B, Vitamin E,  potassium, copper and iron.

Recipe for Pumpkin idli:

Ingredients:

  1. Grated pumpkin – 2 cups
  2. Finely chopped pumpkin – ½ cup
  3. Coarse rice – ½ cup
  4. Jaggery (powdered) – ½ cup
  5. Coconut (grated) – ¼ cup
  6. Coconut pieces – 2 Tbs
  7. Salt – as per your taste (less is better)
  8. Cardamom powder – little
  9. Poppy seeds – 1 or 2 tsp
  10. Water – 1 cup

Preparation:

  • Dry roast coarse rice for few minutes or until it gives slight aroma
  • Dissolve jaggery in little water and boil jaggery for few minutes.
  • Add chopped and grated pumpkin, coconut grated and pieces, salt, poppy seeds, coarse rice and cardamom into jaggery water and mix well.
  • Bring the above mix to idli dough consistency. Not too thin. Keep it aside for half an hour.
  • Apply little oil on idli plates or idli cups.
  • Pour the pumpkin mix into cups or plates and steam cook in a cooker for fifteen minutes.
  • Turn of the heat and allow it to cool. Check whether idlis are cooked or not by inserting edge of knife inside idli. If it is cooked there wont be stickiness in the knife edge.
  • Remove pumpkin idli using a spoon. Dip spoon in cold water and slowly remove idli one by one. If you are using idli plate, cut them to square shape using a knife.
  • Serve pumpkin idli with coconut chutney and ghee.


Author: HealthyLife | Posted on: October 23, 2017
« »
« »

Recommended for you

Gucci just announced fur free by 2018

Gucci just announced fur free by 2018

Starting next year 2018 Gucci, the Italian Fashion Luxury brand is going fur-free. Marco Bizzarri, the CEO of Gucci announced this move in his recent talk in London College of Fashion.

Gucci is famous for its animal fur coat products. According to Bizzarri, Gucci will no longer use any type of animal fur including mink, coyote, fox, rabbit, sheep (Karakul, Swakara or Persian Lamb). These animals in fur industry are subjected to intense cruelty, living their entire lives in filthy cages and are miserable to watch.

The change has come based on the idea of Gucci’s creative director Alessandro Michele who joined the company two years back (2015).

Gucci going fur -free is a game changer – Kitty Block, Humane Society International President.

The remaining fur clothing that are in Gucci’s hold will be sold in an auction and the money made by auction will be donated to animal rights organizations, Humane Society International and LAV – members of the Fur free alliance FFA – an organization well known to initiates legal actions to assert animal rights.

Nearly a staggering one hundred million animals are sacrificed for the fur industry. It can be stopped only when the Fashion designers stop recommending and using fur.

Marco Bizzarri, in his statement said that ‘Being socially responsible is one of Gucci’s core values, and we will continue to strive to do better for the environment and animals”. With the help of animal rights organizations Gucci is ready to take the next steps.  HSUS and LAV is going to support Gucci in identifying and reducing the impacts on both environment and animals.

Gucci thus is joining other leading Fashion brands in going cruelty free product. Other brands who have taken similar good step are Armani, HUGO BOSS, YOOX Net-a -Porter, Stella McCartney to name a few. Gucci is also will be part of the International Fur free retailer program.

Gucci’s this bold step is a good game changer for the whole luxury fashion industry to follow. This bold step will have a huge ripple effect throughout the world of fashion. It means the world fashion in future will be FUR-FREE !!

Reference: www.werindia.com


Author: HealthyLife | Posted on:
« »
« »

Recommended for you

Fish pose, Matsyasana

Fish pose, Matsyasana

In Hindu mythology Matsya or fish is incarnation of Lord Vishnu. Matsyavatara is the name for this incarnation and the belief is that all yogis and saints were protected and carried to safe place by the Lord in fish pose.

Thus the wisdom and knowledge were saved for the benefits of everyone on the planet. In Yoga, the benefit of doing Matsyasana or fish pose is: proper blood circulation to brain, helps in focusing. When we feel we are out of balance fish pose helps us to be focused and get back to normalcy in life.

It also has positive benefits on four chakras situated in lower and upper abdomen, above heart and throat region. Balancing chakra means balancing mind and body.

.

With these, other benefits include reducing thyroid problem, back pain, stretching abdominal and thigh muscles – www.healthylife.werindia.com

LEVEL : Intermediate

Anatomy : Abs, Chest, Hips, Neck, Throat

Pose Type: Backbend, Heart Opener, Supine

Sanskrit: Matsyasana (mot-see-AHS-anna), matsya = fish

BENEFITS

  • Stretches the chest and the front of the throat
  • Opens the pectorals, hip flexors, and intercostal muscles between the ribs
  • Stimulates organs in the throat and abdomen
  • Strengthens the upper back and neck musculature
  • Opens the accessory muscles of breathing
  • Releases tension in the thoracic spine and mid-back

CONTRAINDICATIONS

  • Insomnia
  • Migraine or headache
  • High or low blood pressure
  • Neck or low back injury
  • Glaucoma

HOW TO

  1. Lie flat on your back with your feet together and legs extended in front of you. Rest your arms alongside your body.
  2. Press your elbows and forearms into the ground, and begin to lift your chest, creating an arch in the upper back. Draw your shoulder blades together and lift your upper torso off the ground.
  3. Tilt your head back and continue lifting your chest until you can bring the top of your head to the floor. Keep pressing through your arms. There should be very little weight resting on your head.
  4. Keep your thighs engaged and press through your heels to lengthen the legs. Continue to deepen the arch in your thoracic spine and breathe.
  5. Hold this pose for 15 to 30 seconds.
  6. To release, inhale and lift your head off the floor. As you exhale, lower your head and torso to the ground. Bring your knees into your chest for a counter stretch.

MODIFY OR REPLACE

Alternatives:

Modifications:

  •  Lay with a bolster underneath the shoulders and allow the head to drop back. This opens the chest and relieves pressure on the back of the neck and head.

SEQUENCING TIPS

Before:

  • Salamba Sarvangasana (Shoulderstand)
  • Setu Bandha Sarvangasana (Bridge pose)
  • Bhujangasana (Cobra pose)
  • Urdhva Mukha Svanasana (Upward-Facing Dog)

After:

  • Ustrasana (Camel pose)
  • Virasana (Hero pose)
  • Savasana (Corpse pose)

TEACHING CUES

  • Make sure to support your weight on your elbows and forearms, not the top of your head.
  • Really arch the upper back and open your heart.
  • Reach out through your heels and point the toes to lengthen your legs.

VARIATIONS

  • Lift your arms overhead and join the palms together. Then reach back and touch the floor behind you.
  • Begin in Padmasana (Lotus pose) and recline down to the ground. Then follow steps 2-7, keeping the legs crossed.

WATCH OUT FOR

  • Too much pressure on the head
  • Hyper-extending the neck or throat

This article and image published here with prior permission from beyogi.com


Author: HealthyLife | Posted on: October 18, 2017
« »
« »

Recommended for you