All posts by HealthyLife

HealthyLife is a part of www.WeRIndia.com, an all India – centric website (https://healthylife.werindia.com) and is solely owned and operated by WeRIndia.com. It is a Indian nutritional portal providing educational articles.This nutritional port was launched on February 5th, 2015.
Microplastic contamination in Sea salt

Microplastic contamination in Sea salt

What goes around, comes around. We all know how our earth and oceans both are piled up with plastic. The land, the sea, river, tap water and now salt all are contaminated with microplastic. While sprinkling salt on our dishes one should now start wondering how much plastic particles we could be consuming?

Recent studies showed presence of microplastics in samples of tap water all over the world. Previous report in Environment and technology says that sea salts might contain microplastic because plastics are

Sherri Mason, Professor of Chemistry at state University of New York Fredonia, reported microplastic levels in various food and beverage products.

This included various brands of beer, drinking water, 12 brands of salts including 10 sea salts. Mason had concluded that on an average Americans could be consuming up to 660 particles of plastic annually. This number may be more than 660 considering that 90 percent of Americans are consuming too much sodium (in the form of salt as reported by CDC).

Earlier in 2015 a research group (in 2015) from Donghua University and State Key Laboratory of Estuarine and Coastal Research, China Tested 15 brands of sea salts, lake salts and rock/well salts from supermarkets throughout China. The results showed microplastic content in sea salt =550-681 particles/kg, 43-394 particles/kg in lake salts and 7-204 particles/kg in rock/well salts.

Results indicates that microplastic pollution is heavy in abiotic sea products. In sea salts, fibers and plastic fragments were prevalent types when compared to pellets and sheets. The presence of microplastics polyethylene terephthalate followed by polyethylene and cellophane in sea salt is more abundant compared to lake and rock/well salts. Of the 16 several brands that came from Australia, France, Iran, Japan, Malaysia, New Zealand, Portugal and South Africa were tested for microplastics. And only one brand of salt from France reported to lack any plastic contamination.

What adverse effect microplastic from salt could have on humans? The United Nations has declared plastic pollution a threat to human health. No exhaustive studies have been completed that can give us a clear idea about long-term risk of plastic consumption to human body.

What goes around, comes around. Each year humans dump nearly 13 million metric tons of plastic into the ocean. At present the amount of microplastic might be low and may not have impact on our health. However, if we keep increasing the plastic usage and dump it in earth and water then we should expect that we are contaminating sea food and salt heavily. These microplastic fibers eventually enters our body and pose health problems – what type – we don’t have answer yet.

References:

Photo by Quang Nguyen Vinh from Pexels (Free for commercial use)


Author: HealthyLife | Posted on: September 19, 2017
« »
« »

Recommended for you

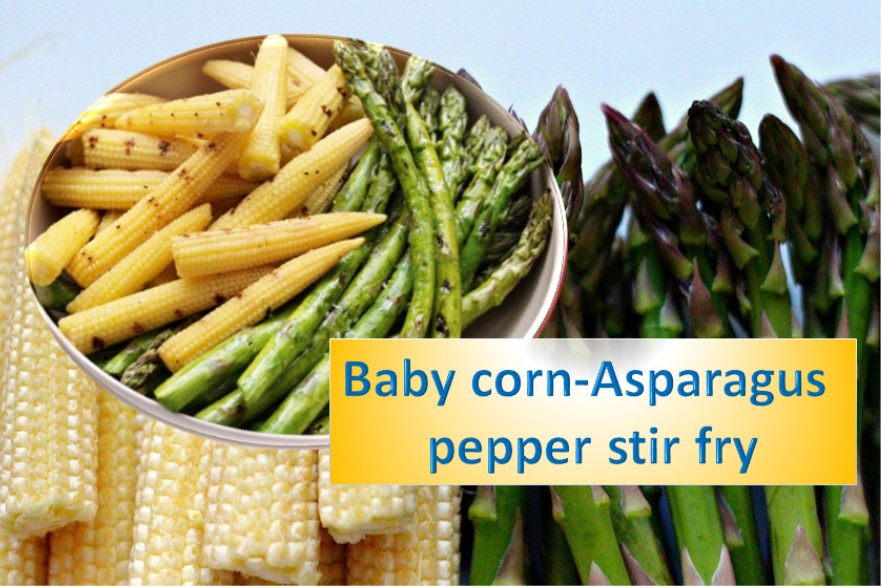
Baby corn asparagus pepper stir fry

Baby corn asparagus pepper stir fry

Baby corn – the immature ear of corn is very tasty and several dishes can be prepared using baby corn. It is mildly sweet and tender. As soon as the corn silk peeks out, baby corn will be harvested and used in cooking.

Manchurian, pepper fry, stir fry, soup are popular dishes made out of baby corn to name few.

In Asian cooking, if a dish lacks texture baby corn fulfills it by giving pleasant taste and crunchiness.

And, we all know how good is asparagus to us. Rich in fiber and supplies multiple nutrients. It is loaded with nutrients like folate, vitamin A, C, E and K. It supplies good amount of fiber. It helps in fighting cancer as it has rich source of glutathione a detoxifying compound.

It is packed with antioxidants and has ability to neutralize cell-damaging free radicals. Asparagus with baby corn – a good combination for many delicious dishes including stir fry.

Baby corn asparagus pepper stir fry

Ingredients

  1. Green asparagus -15
  2. Baby corn – 250 grams
  3. Green chilli – 4
  4. Leek – 1
  5. Olive oil or Canola oil – 2 Tbs
  6. Cumin seeds – 1 tsp
  7. Crushed pepper – 1 tsp
  8. Salt – as per your taste

 Preparation

  1. Wash all vegetables using water.
  2. In a pan add water and bring it to boil. Now add baby corn and blanch for about 5 minutes. Remove baby corn and place on tissue paper
  3. Slice leek into thin rings.
  4. In a pan heat little oil on medium heat, add cumin followed by green chilli and sauté for few seconds.
  5. Now add both types of asparagus and blanch for few minutes.
  6. Add blanched baby corn and sprinkle salt and crushed pepper
  7. Stir fry all ingredients for few minutes – you should get good aroma from the vegetables.
  8. Serve stir fry with white rice or chapathi

Recipe: www.werindia.com


Author: HealthyLife | Posted on: September 18, 2017
« »
« »

Recommended for you

Compass Pose

Compass pose

Compass pose or Parvrtta Surya Yantrasana is an advanced Yoga pose should be performed under the guidance of an instructor.

It is also called Sundial pose.

It opens the hip, strengthens shoulders and hamstrings. With this it also strengthens the spine and stretches it in a unique way.

While performing the pose breath in and breath out to get into the flexibility. – Healthylife.werindia.com

LEVEL : Advanced

Anatomy : Hamstrings, Ribs, Spine

Pose Type : Hip Opener, Seated

Sanskrit : Parivrtta Surya Yantrasana (par-ee-vrt-TAH sir-yah yahn-TRAHS-anah)

parivrtta = revolved,  surya = sun, yantra = instrument

BENEFITS

  • Stretches spinal side flexors, hamstrings, and groin
  • Opens the sides of the ribcage, shoulders, and tissues of the lung meridian
  • Lengthens the latissimus dorsi muscle along the sides of the ribcage
  • Strengthens the hip flexors and core

CONTRAINDICATIONS

  • Hip pathologies
  • Low back pathologies
  • Groin, knee, shoulder, or hip injuries

HOW TO

  1. Start in Sukhasana (Easy pose).
  2. Keeping the left leg bent and grounded into the mat, place your right hand down in front of your left shin.
  3. Bring your right knee up toward your chest, and attempt to draw your right shoulder under the crease of the knee. Aim to bring the knee as high as possible on the shoulder.
  4. Take the left hand and reach for the outer edge of the right foot.
  5. Inhale and begin to extend your right knee while simultaneously drawing the left arm behind your head. Ground down into your sitting bones as you exhale.
  6. Hold this pose for up to 10 slow breaths. Use your inhales to lengthen the spine and exhales to deepen the stretch.
  7. To exit Compass pose, inhale and lengthen your spine. Then exhale, release the foot, and bend the right knee to slowly dissolve out of the posture. Repeat on the opposite side.

MODIFY OR REPLACE

Alternatives:

  • Parivrtta Janu Sirsasana (Revolved Head to Knee pose)

Modifications:

  • Utilize a strap for support.

SEQUENCING TIPS

Before:

  • Parivrtta Janu Sirsasana (Revolved Head to Knee pose)
  • Trikonasana (Triangle pose)
  • Ardha Matsyendrasana (Half Lord of the Fishes pose)
  • Baddha Konasana (Bound Angle pose)

After:

  • Paschimottanasana (Seated Forward Fold)
  • Upavistha Konasana (Wide-Angle Seated Forward Bend)

TEACHING CUES

  • Keep the upper and lower spine lifted through the torso and firm your abdominals.
  • Lift your ribcage away from your hips and press the hips forward to deepen the stretch.
  • Press your foot into the palm of your hand to create a bandha (lock) for support.
  • Be cautious of your low spine and keep the lower abdominals drawn up and in.

VARIATIONS

  • Standing Split: The right leg reaches to the ceiling; the arms bind around the right leg and behind the back.

WATCH OUT FOR

  • Pain/strain in the shoulder, hamstring, spine, hip, or knee
  • Sitting bones lifting off the floor
  • Rounding of the spine

This article and image published here with permission fro beyogi.com. For more poses please visit www.beyogi.com


Author: HealthyLife | Posted on: September 14, 2017
« »
« »

Recommended for you

CPR - Call Push Rescue

Call Push Rescue CPR

Call Push Rescue CPR :Cardiopulmonary resuscitation or CPR procedure can help to save a life during a breathing or cardiac problem or emergency. Nearly 400,000 deaths happen outside the hospital due to cardiac arrest in Unites States alone. This includes not getting immediate CPR when needed.  Understanding what CPR and how to perform CPR is a special skill. Many undergo CPR training, however often they forget what are the steps involved in CPR. And, most of us don’t know how to perform CPR. If somebody undergoes cardiac emergency, instead of stepping into help or take care of the situation we become helpless. This is alarming, as most of the cardiac or heart attack incidents happens at home. This is where CPR comes to rescue. If we know the steps of CPR we can perform it on the person and rescue the life.

Before Giving CPR

  1. Look at the scene, surrounding and the person who needs CPR. If the scene is safe, tap the person on the shoulder and then shout loudly “Are you OK?” to ensure that the person needs help.
  2. Call emergency assistance number. If you feel the person needs assistance call the emergency number immediately.
  3. Open the airway – with the person lying on back tilt the head back slightly to lift the chin.
  4. Check for breathing – listen carefully for less than 10 seconds for breathing sound. When the airway is open and clear, check for normal breathing:
  • Look and feel for movement of the lower chest and upper abdomen.
  • Listen and feel for air coming from the patient’s mouth or nose.
  • Feel for movement of the lower chest and abdomen and for the escape of air from the patient’s mouth or nose.
  • Check for normal breathing but ignore occasional gasps which are inadequate to maintain life.

If the patient is breathing, move them and support them on their side with their head tilted back and continually monitor their breathing.

If the person is not breathing normally, then proceed with CPR

CPR steps

  1. Push hard, push fast. Place your hands, one on top of the other, in the middle of the chest. Use your body weight to help you administer compressions that are at least 2 inches deep and delivered at a rate of at least 100 compressions per minute. Follow the steps as below;
  •  Place the heel of ONE HAND in the center of the chest.
  • Keep your elbow locked and lean over the patient so your arms are straight.
  • Push down hard and fast 30 times (push down one-third of chest depth).
  • If you find pushing the chest difficult with one hand, place your other hand on top and continue compressions as for an adult.
  1. Deliver rescue breaths. With the person’s head tilted back slightly and the chin lifted, pinch the nose shut and place your mouth over the person’s mouth to make a complete seal. Blow into the person’s mouth to make the chest rise. Deliver two rescue breaths, then continue compressions.

*Note: If the chest does not rise with the initial rescue breath, re-tilt the head before delivering the second breath. If the chest doesn’t rise with the second breath, the person may be choking. After each subsequent set of 100 chest compressions, and before attempting breaths, look for an object and, if seen, remove it.

  1. Continue CPR steps. Keep performing cycles of chest compressions and breathing until the person exhibits signs of life, such as breathing, an AED becomes available, or EMS or a trained medical responder arrives on scene.

 CPR for children

Children over one year old

  1. Open the child’s airway by placing one hand on the child’s forehead and gently tilting their head back and lifting the chin. Remove any visible obstructions from the mouth and nose.
  2. Pinch their nose. Seal your mouth over their mouth and blow steadily and firmly into their mouth, checking that their chest rises. Give five initial rescue breaths.
  3. Place the heel of one hand on the centre of their chest and push down by 5cm (about two inches), which is approximately one-third of the chest diameter. The quality (depth) of chest compressions is very important. Use two hands if you can’t achieve a depth of 5cm using one hand.
  4. After every 30 chest compressions at a rate of 100 to 120 per minute, give two breaths.
  5. Continue with cycles of 30 chest compressions and two rescue breaths until they begin to recover or emergency help arrives.

Infants under one year old

  1. Open the infant’s airway by placing one hand on their forehead and gently tilting the head back and lifting the chin. Remove any visible obstructions from the mouth and nose.
  2. Place your mouth over the mouth and nose of the infant and blow steadily and firmly into their mouth, checking that their chest rises. Give five initial rescue breaths.
  3. Place two fingers in the middle of the chest and push down by 4cm (about 1.5 inches), which is approximately one-third of the chest diameter. The quality (depth) of chest compressions is very important. Use the heel of one hand if you can’t achieve a depth of 4cm using the tips of two fingers.
  4. After 30 chest compressions at a rate of 100 to 120 per minute, give two rescue breaths.
  5. Continue with cycles of 30 chest compressions and two rescue breaths until they begin to recover or emergency help arrives.

Remember – compressing the chest is the most important part of CPR. CPR alone will not be able to start the heart function. However, it restores the partial flow of oxygenated blood to both heart and brain. It avoids the tissue death and brain damage. The most common injury that can happen while doing CPR is rib fracture.

Watch this video to understand how to perform CPR

https://www.youtube.com/watch?time_continue=1&v=9t5MLAB-HZQ

References:

  • http://www.nhs.uk
  • American Red Cross
  • British Heart Association
  • American Heart Association

Image credit: “The Skills Show 2012 – Day 1 General” by WorldSkills UK is licensed under CC BY 2.0


Author: HealthyLife | Posted on:
« »
« »

Recommended for you

Many benefits of common plant - Oxalis

Home remedies of Indian Changeri Oxalis

Home remedies of Indian Changeri Oxalis: -Oxalis sp. also known as Sorrel Changeri or Indian Changeri (O. corniculata) is a common, indigenous plant that appears everywhere. Commonly considered as a weed Oxalis has many good qualities. This plant leaves have culinary benefits and can be used for many remedies. In traditional systems of Ayurveda, Unani and Siddha Medicines Oxalis plays an important role. Taste of leaves is sour-acidic and slightly sweet and it is somewhat like tamarind taste.  It is a good source of Vitamin C.

Culinary uses:

  1. In many small towns and villages of India people use leaves for preparing tasty dishes. Rasam, raita with coconut, green chutney and for salad. It also replaces tamarind for spicy sambar dish.
  2. Oxalis rasam: Instead of adding, tomato, tamarind or lime juice for traditional rasam, one can add oxalis leaves and prepare rasam with daal. It has a unique taste.
  3. Oxalis spicy buttermilk: Oxalis leaves paste added to buttermilk along with little green chilli, cumin, asafetida, salt and seasoned with mustard and curry leaves has a special taste.
  4. Oxalis chutney: Just like coriander chutney one can prepare green chutney using Oxalis leaves. No need to add lime juice or tamarind as Oxalis leaves itself has sour taste.

Home remedies:

The extract of Oxalis leaves in Ayurveda is called Changeri swarasa. It has many useful health benefits and cures many conditions.

  1. For insect bites: Oxalis leaf juice helps in reducing the itching and pain of insect bite. It also reduces the swelling caused by insect bites.
  2. For indigestion: Oxalis leaf juice mixed in buttermilk should be taken for indigestion. Add cumin and salt for this oxalis buttermilk – it controls indigestion and helps in easy digestion. Another way to control indigestion is – boil the oxalis leaves in water and cool. Add buttermilk to cooled water and drink.
  3. For chronic dysentery: Extract oxalis juice and add to 1 tsp of juice add 1 tsp of honey and consume twice a day.
  4. Jaundice cure: Twice a day mix about 2 tsp of oxalis juice in one cup buttermilk and drink.
  5. For piles: Oxalis Changeri ghrita (=ghee/clarified butter) helps in curing problems related to piles and intestine.
  6. Cosmetic application: Oxalis leaves paste with sandal wood applied helps to release wrinkles.
  7. Low appetite: Green chutney with oxalis, ginger and mint leaves increases appetite.
  8. Knee and joint pain:
  • Oxalis juice with garlic – grinded and made to a paste can be applied for joint pain. It reduces swelling and pain.
  • Another way to use it is, frying oxalis leaves in castor oil and use as poultice on the joint pain.
  1. For headache: Apply paste of oxalis leaves to get relief from headache. One can add fresh corn of few green (black) pepper along with oxalis. Prepare paste and apply on both sides of forehead.
  2. For good sleep: Oxalis juice also heals insomnia and reduces sleep problem.

Indian sorrel contains high concentration of oxalic acid. People who have rheumatism, gout or kidney stones should avoid using Oxalis.

Grandma’s remedies: Healthylife.werindia.com


Author: HealthyLife | Posted on: September 13, 2017
« »
« »

Recommended for you

Add few more grandma's handy tips to your list

Add few more of grandma’s handy tips to your list

Add few more of grandma’s handy tips to your list

  1.  Apply petroleum jelly to get used to new shoe. Stop blistering by applying soft deodorant behind heels.
  2. To remove odor from shoe, use cat litter. Fill cat litter in old sock & place inside the shoe to absorb smell.
  3. If your favorite cloth is shrunk after washing don’t get disappointed. Add baby shampoo to luke warm water and soak the shrinked cloth half an hour. Remove and use normal water to wash.
  4. To de pill your cloths/jeans use razor. Run the razor softly on the cloth and remove the puffs.
  5. Apply tea candle wax on winter shoe and use hair drier to melt the candle. Wax will spread on the shoe equally and keeps your shoe water proof.
  6. Do you know? Freezing the denim one a while helps in removing odor and long lasting.
  7. To remove make up foundation from your blouse or shirt use shaving cream. Apply shaving cream on the makeup foundation mark and leave it for few minutes. Wash using gentle detergent.
  8. If you don’t have place to store your clothes, rolling your clothes (not suite or expensive clothes) than folding the cloths should help. Same technique you can apply while packing suitcase for your trip.
  9. To keep the original color of jeans, while washing jeans use one cup of distilled vinegar. Vinegar helps to set the color of jeans.
  10. To remove red wine- Dab red wine as much as possible. Apply salt on the red wine and dab as best as you can. Then use white wine to neutralize the stain followed by adding baking soda and wash the cloth.
  11. If your cloth has bleach spots, use a matching color sharpie and covet the spots!
  12. To remove oil stains from clothes, use talcum powder. Put talcum powder on oil marks and allow it to sit for few minutes. Wash clothes using regular detergent afterwards.

Collection: From grandma @ Healthy life


Author: HealthyLife | Posted on: September 12, 2017
« »
« »

Recommended for you

WHO OWNS SEEDS? IS IT FARMERS OR INDUSTRIAL GIANTS?

Who Owns Seeds? Is It Farmers Or Industrial Giants?

Seed is constantly creating and recreating itself. Farmers, who sowed, bread, saved and exchanged seeds for thousands of years, always own the seeds.

Sadly, the arrival of commercial seed industries changed the whole picture.

These Multinational Corporation had successfully taken away the ownership of seeds from the hands of the farmers in the form of patents. At present, seeds are largely controlled by industrial giants like Monsanto, Du Pont, Syngenta and Bayer.

A patent is an exclusive right granted to an inventor to make and sell the patented product. Patent prevent farmers from saving or exchanging seed, therefore, undermining the farmers’ rights or seed sovereignty. Patent creates monopolies, which undermine the choice of farmers as well as all citizens as eaters.

A seed is not an invention. That is why patents on seeds are illegitimate. Even in a genetically engineered crop, the original seed come from farmers. Patents on seed are  based on biopiracy.

Patents on seeds  which allow corporations to own seed are illegal at many levels. (http://seedfreedom.info/)

First, seed is not an invention. Seed is constantly creating and recreating itself. To treat seed as a corporate invention and grant corporations patents on seed violates ethics or patent law itself.

Secondly, all seed has been evolved by nature and farmers over millennia. The corporation takes farmers varieties, use the trait they found commercially useful, and take a patent or intellectual property right. Patents on seed are always based on Biopiracy.

Thirdly, patents on seed allow corporations to prevent farmers from saving and exchanging seed. Thus patent violates farmers’ right to save, use, reuse, breed and exchange seed as their commons.

Fourthly, patents on seed allow corporations to sue farmers’ after the GMO is owned by corporations.They genetically contaminate farmers’ non GMO crops. This happened to Percy Schmeiser, the Canadian farmer.

Fifthly, the international law that forced patents on seed, the TRIPS agreement, is itself currently illegal because it exists in violation of the mandatory review built into the agreement.

The below article explains how one of the major seed industry is under attack for capturing seed freedom from farmers of Ghana. 

Seed Freedom Under Attack from Monsanto-backed G7 Initiative

By Heidi Chow  (http://www.commondreams.org/)

Heidi Chow is a food campaigner with “Global Justice Now”.

“My mother gave me some seeds to plant. And I’m also giving those seeds to my children to plant. So that is ongoing, every time we transfer to our children.  And that is how all the women are doing it. We don’t buy, we produce it ourselves.” Sitting together in the heat of the Ghanaian sun, Esther Boakye Yiadom explained to me the importance of seeds in her family and the transfer of knowledge between the different generations of women.

The ability to save and exchange seeds, after each growing season is an age-old practice that ensures that small scale farmers have seeds to sow the following year. The seeds are free for the farmer and they have the knowledge of what seed is required, for what conditions and the different tastes that complement the food they cook. Where they do not have a particular seed, they can ask other farmers in the community to share seeds. This ‘freedom’ is essential for sustainable livelihoods as well as ensuring communities have access to nutritious and culturally relevant food. But this is all under threat by a proposed bill – dubbed the ‘Monsanto Law’ – in Ghana that would bolster the power of multinational seed companies whilst restrict the rights of small farmers to keep and swap their seeds.

For FULL ARTICLE, please click on below link

http://www.commondreams.org/views/2015/05/15/seed-freedom-under-attack-monsanto-backed-g7-initiative

Image courtesy: http://www.farmradio.org/


Author: HealthyLife | Posted on: September 9, 2017
« »
« »

Recommended for you

Carrot Apple & Cherry Salad

Roasted Carrot, Apple and Cherry Salad

Ingredients:

1. Basting oil:
(a) 1/2 cup Pure Olive Oil
(b) 1 large clove peeled garlic, minced
(c) 2 tsp fresh parsley, chopped
(d) 1/2 tsp ajwani seeds

2. Salt and pepper to taste

3. Dried cherry 1 cup

4. Apple 1 cup sliced

5. Carrots – about 1 cup

6. 1 tsp flax seeds or sunflower seeds

7. Dry walnut

8. Lime juice

Preparation:

  • Preheat oven to 4500 Toss carrots in large bowl with basting oil. Season with salt and pepper. Arrange in single layer on baking sheet. Roast 10-12 min. Remove from oven; set aside t cool.
  • Alternate to oven: If oven is not available use Indian tava & roast the carrots in little olive oil under low to medium heat with salt and pepper.
  • Toss carrots, apples, pineapple, salt and pepper, walnuts, flax or sunflower seeds, little lime juice and olive oil all in the bowl and serve.

Author: HealthyLife | Posted on: September 6, 2017
« »
« »

Recommended for you