HealthyLife is a part of www.WeRIndia.com, an all India – centric website (https://healthylife.werindia.com) and is solely owned and operated by WeRIndia.com. It is a Indian nutritional portal providing educational articles.This nutritional port was launched on February 5th, 2015.
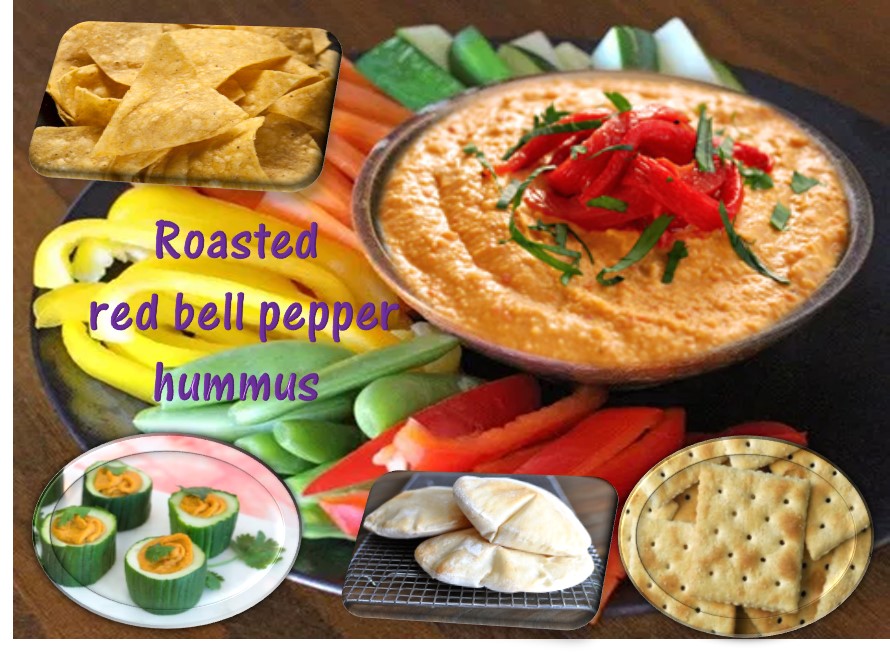
Roasted Red Bell Pepper Hummus
Hummus is a famous, traditional Middle Eastern dish and commonly served with pita bread. It is made of chickpeas. Garbanzo beans is another common name for chickpeas in Western market. Chickpeas available cooked in cans in salt water. One can use these chickpeas or soak dry chickpeas to prepare dishes. Hummus being so popular because of its somewhat bland taste is available in market with different additional ingredients – cilantro, garlic, bell pepper, mint hummus etc. Roasted red bell pepper hummus is slightly darker color and has a tangy taste to it. It is easy to prepare.
Chickpeas serve plant based protein in good quantity and is a good replacement for meat. It also known to contains less calories and good for heart health. It has good fiber content. It also supplies iron, phosphate, calcium, magnesium, manganese, zinc, and vitamin K all contribute to building a proper body structure and helps in overall health.
Recipe for Roasted bell pepper hummus
Ingredients:
Chickpeas (cooked) – 1 cup
Cilantro leaves – 1 Tbs
Parsley leaves – 1 Tbs
Red pepper – 1 medium size
White sesame seeds – 1 Tbs
Cumin powder – ½ tsp
Lemon juice – 2 Tbs
Olive oil – 1 Tbs
Garlic clove – 1 or 2
Red chilli powder – ¼ tsp
Salt – as required
Method:
Soak chick peas till they expand. It might need overnight soaking or 8 to 10 hours soak.
Cook soaked chick peas in pressure cooker, drain water and keep aside
On medium heat / flame, burn (roast it using tong ) the red pepper until skin turns slightly black on all side. Open and remove seeds. Cut bell pepper into small pieces.
Roast sesame seeds on low flame.
In a food processor or mixer puree chick peas and add roasted bell pepper, cilantro, parsley, garlic cloves, lemon juice, roasted sesame seeds, cumin powder, olive oil, red chili powder and salt.
Grind all ingredients until it becomes smooth and fluffy.
Transfer the content into a bowl and keep in refrigerator for an hour or so.
Before serving sprinkle little chopped cilantro leaves.
Serve red bell pepper hummus with pita bread, bread, roti, veggies like cucumber, carrot, celery or give with crackers.
It is a good side dish or dip for lunch items too!
www.werindia.com
Author: HealthyLife | Posted on: December 26, 2017
Firefly pose is an advanced yoga pose that needs both focus and strength. Watching someone doing this pose looks scary. But with practice one can perform the pose. Both arms must be strong enough to hold the entire body to keep from falling. While doing this pose fear must be released from mind and tension should be released from hips. This is the advantage of doing this pose. Pose encourages focusing and willpower to hold. It tests the patience and decreases the anxiety. It is best to flex hamstring and stretch hip region. Abdominal muscle becomes strong by practicing the pose. Sanskrit name for this is Tittibha which means firefly. Like firefly the illuminates, this pose helps to bring the inner awareness and recognize once ability and gives confidence. – Healthy Life
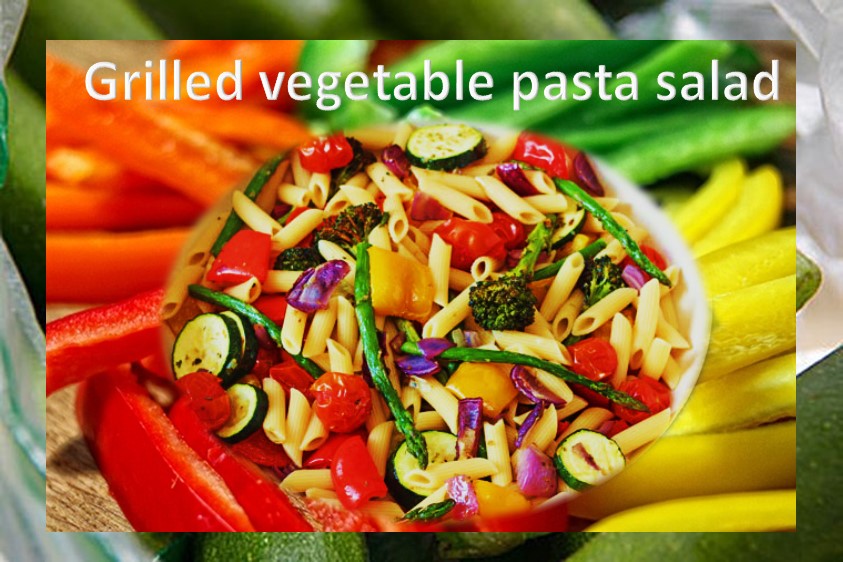
Today we are presenting you a very simple and quick recipe. Pasta with grilled vegetables salad. Call it Grilled Veggie Pasta salad. It is tasty, delicious and easy to prepare. Pack it for lunch for kids or serve it as an evening snack item.
Ingredients:
Pasta – 1 cup
Zucchini – 2 cups (cut round or into 1 inch pieces)
Bell pepper – 2 cups (get three colors – orange, green and red)
Cherry tomatoes – 2 cups (cut into half or use Roma tomatoes)
Asparagus – few
Onion – half
Olive oil – 2 Tbs (or your choice of oil)
Salt – as per your taste
Crushed pepper – 1 tsp
Vinegar – 2 Tbs
Lemon juice – 2 tsp
Ginger zest – 1 tsp
Sugar – 1 tsp
Preparation:
Cook pasta as per the instructions and keep aside.
Place a pan on medium heat, add zucchini, bell pepper, onion, asparagus and sprinkle salt. Fry these vegetables until they turn brown (it may take about 10 mins)
Add tomatoes and slightly sauté them for couple of minutes. Make sure not to overcook tomato.
Babies cry a lot when they have gas trouble and tummy ache. When there is gas babies cry, fart, stomach bloats, tummy hardens and baby becomes fussy and cranky. To give relief from the gas for baby parents can think of giving following remedies.
Try these preventive measures:
Burps: Burping during and after feeding can help release air. Lift baby and hold her close to your chest and slowly move your hand on her back. She will burp and feel better. Burping midway through the feeding and afterwards will help.
Gentle massage: Give massage onbaby’s tummy. Take little baby oil or coconut oil and apply on tummy. Slowly, gently move your hand on tummy. Do it 2 – 3 times a day & you will see a smiling baby!
Settle bottle: If you are feeding baby with bottle, chance of baby ingesting bubbles is more. Before keeping bottle in baby’s mouth, allow bottle to settle down. Tilt the bottle at an angle so that milk fills the bottle nipple area too. This way air does not go inside baby.
Holding baby in proper angle: When you are feeding baby, hold baby’s head higher than stomach. This helps liquid to settle down in tummy and the bubble rise on top. Later you can make her burp.
Baby’s diet:Read label to understand the contents of baby’s formula. If any ingredients makes it hard for her digest, it can cause gas too. If you are breast feeding, watch what you eat. Your milk carries those food to baby. If you eat gas producing food, then baby will be end up in gas and stomach ache.
Peddling legs: Put baby on a mat or let her lay on your extended legs. Then pump her legs gently – in bicycling peddling motion. It relieves gas and gives little leg exercise too!
Gentle massage: Give massage on baby’s tummy. You can take help of good oil for this. Baby oil, coconut oil and mustard oil – all three are good for baby. Apply one of this oil on the tummy and slowly, gently move your hand on tummy. Do it 2 – 3 times a day & you will see a smiling baby! Massaging using oil not only gives relief from gas, also helps in sleeping.
Feeding method: Do not rush while feeding the baby. Sometimes the semi solid and solid food that we feed in a hurry can sit in baby’s system for longer hours and can cause indigestion and lot of gas that hurts the little one. Go slow, take your time and make sure baby is relaxed while you feed. Don’t forget to burp her.
Culprit can be bottle too: Change the bottle, nipple and use fresh, recommended bottle for baby.
Other remedies: Some of the popular traditional remedies for babies gas and farting are given below. These remedies for babies 6 months and above only. Contact your doctor (pediatrician) before proceeding with these remedies.
Carom seeds: Boil few carom seeds in water and give half a teaspoon to baby. Do this few times (3-4 times) a day.
Asafetida:Mix pinch of asafetida (hing) in coconut oil. Heat few seconds (12 seconds in microwave). Check the temperature and apply it around baby’s belly button. Asafetida known to reduce gas in adults when taken with buttermilk. However baby should not be given asafetida through mouth. So, apply on tummy.
Cumin water: Boil ½ tsp of cumin in a 1.5 cups of water. Filter and give ½ tsp of cumin water. This reduces bloating and reduces gas.
Gripe water: It is one of the alternate preferred medicine by parents from decades. It contains dill oil and sodium bicarbonate. It is used for gas relief, reflux in babies. Talk to your pediatrician before giving gripe water to baby. In case your doctor recommends, look at the ingredients and make sure it does not contain alcohol and sugar in it.
If none of the remedies and recommendations did not work with in few hours means time to talk to pediatrician.
Grandma’s remedies: www.healthylife.werindia.com
Image credit: Image by Pexels from Pixabay (Free for commercial use)
Author: HealthyLife | Posted on: December 15, 2017
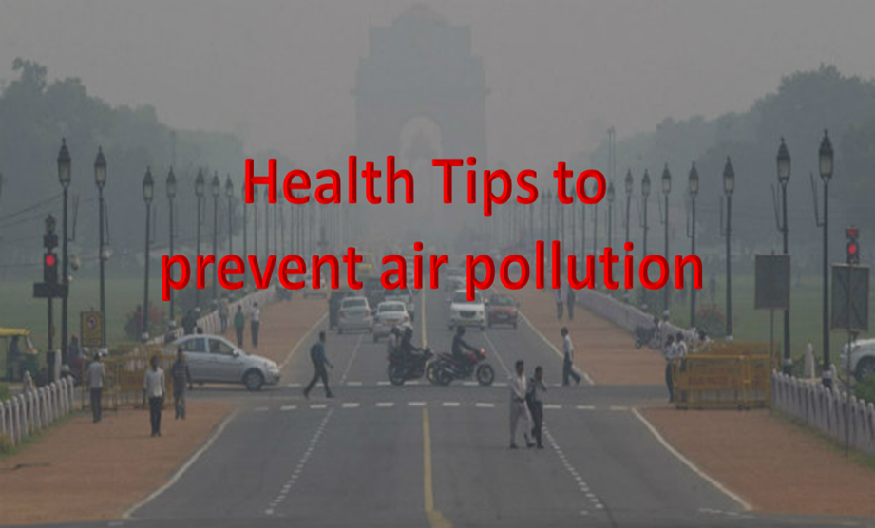
Recently New Delhi, India has faced severe air pollution. Millions of people suffered from the poor quality of air and outdoor activities, day to day life heavily affected by air pollution. What causes air pollution and how to prevent and what precautions one should take?
According to WHO (World Health Organization) air pollution is posing great environmental health risk. Air pollution is the reason for one in nine deaths worldwide (WHO). Local air quality is important for us to live and breathe.
Three reasons for air pollution – bad ozone, carbon monoxide and sulfur dioxide. What we need to remember is all the three pollute environment because of human activities.
Bad ozone particle pollution: Ozone level is high when the temperature is warmer. Bad ozone forms near the ground when the particles from various sources (automobile, power plants, refineries, chemical plants etc.) mixes with ozone. Particles are what present in poor quality air and these can be fine or coarse (dust) particles. Particles present in the air can aggravate or cause many health problems and can be fatal too. Fine particles (can be seen through microscope) are responsible for severe and serious health problems.
* What is ozone: Ozone is present naturally in the Earth’s upper atmosphere (6 to 30 miles above earth’s surface). Natural ozone protects us from harmful UV rays.
Carbon monoxide: This colorless gas that is emitted by automobile is also responsible for poor quality. When the carbon fuel does not burn completely carbon monoxide forms. When fills in air it affects our health.
Sulfur dioxide: It is a colorless, reactive gas. When sulfur containing fuels such as oil and coal are burned sulfur dioxide releases. It is present in larger industrial areas – power plants, refineries and industrial boilers.
Who will suffer more from poor air quality?
Generally, as the concentration of bad ozone level increases at ground level, people get sick. People who go for outdoor activities when meet poor air quality, can start developing breathing issues. People who have lung diseases such as chronic bronchitis, emphysema, asthma are sensitive to ozone. They experience issues ever at lower level of particles. Young adults and children who play outside are also at higher risk of developing asthma and bronchitis by aggravated exposure.
Carbon monoxide -People who have heart condition can develop chest pain and are most at risk. Breathing difficulty, chest tightness are other two reactions one can face.
Sulfur dioxide at higher levels causes wheezing, chest congestion, shortness of breath even in healthier people.
What health affects one can have with air pollution: Dirty air can harm not only lungs, it reaches beyond lungs
Irritation in respiratory system, throat soreness, airway blockage, chest tightness, chest pain while breathing
Reduced lung function – making it difficult to breath and uncomfortable feeling
For shopping, entertainment and visiting friends and families avoid warmer day – instead go out when it cools down like evening hours.
How to reduce air pollution?
Conserve energy wherever you are – at home, work and schools
Buy product that has Energy star label
Get into habit of carpool, using public transportation, ride bicycle or walk if possible
Keep all your vehicles properly tuned and reduce polluting the environment
Grow plants – indoor and outdoor plants to reduce air pollution. Plants helps in getting good air quality
Avoid using wood fireplace and burning leaves, trash and any such materials.
Do not use or avoid using gas -powered garden equipment
Understanding Air quality index: Also known as AQI tells us how clean is the air that we breathe every day. It focuses on health effects that we experience within few hours of a day and guides us to take precaution. The AQI is calculated based on four types of air pollution – ground level ozone, particle pollution, carbon monoxide and sulfur dioxide. The yard stick for AQI is 0 to 500. The higher the AQI number, the higher the pollution level is.
Good: Air quality is considered good when the index is between 0-50 and is okay to step out. Index is represented by green color
Moderate air quality is when air quality index is 51-100 : Do not spend too much time exposed to outside air – yellow color
Unhealthy for sensitive people group: Air quality: 101-150 is the index and people with heart or lung disease, older adults and children should reduce exposure and heavy exertion – Orange color
Unhealthy is between 151-200 air quality index. People with heart, lung diseases and other breathing problems and allergies should avoid prolonged exertion – Red color
Very unhealthy: When the air quality is above 201 –300 People who are suffering from heart, lung diseases and sensitive people with conditions and children should avoid all outdoor physical activities. – Purple
Hazardous: AQI is 301-500. Not good for anybody -Maroon
AQI can be found on internet with your local weather list.
Protect yourself and your family from air pollution. If you develop any of the above-mentioned illness due to pollution take proper precaution and care. If the condition aggravates and if you find it difficult to breathe contact your doctor.
Surya Bedha Pranayama is yogic breathing exercise which helps to calm the mind and any mental stress. It works as a medicine on tired and stressed mind and helps to relax. Performing Surya bedha pranayama in morning hours with Sun Salutation (Surya namaskara) has additional, positive benefit for both body and mind.
Surya stands for Sun and bedha is for piercing or breaking (through an object or something). In Yoga right nostril is called Surya nadi or pingala and left is Chandra nadi or ida nadi. Sun’s vitality is referred to right nostril. It is this nostril through which the physical and mental relaxation by means of breathing exercise happens. It means the air that we breath through right nostril impacts the energies in our body.
How to perform Surya bedha pranayama
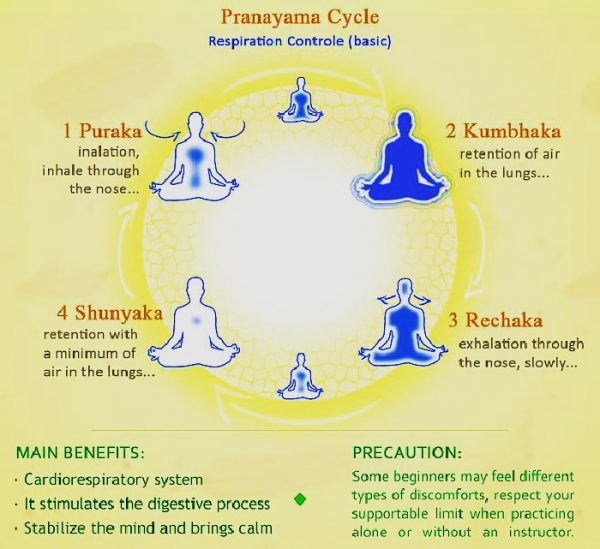
Surya bedha pranayama breathing is inhaling through right nostril and exhaling through left nostril. Best time to do this breathing exercise is early morning hours. Before commencing the breathing, exercise have a glass of warm water and after 10 minutes start the breathing exercise.
Keep your both hands on your thighs in Jnana mudra position.
Relax your mind and body. Take deep inhale and exhale.
Now, close your left nostril using right middle finger and inhale through right nostril.
Hold the breath for 5 to 10 seconds count – (this is called Jalandhar bandha). While holding your breath bend your chin towards throat. And, during the process of retention try to pull upward from your seat. (it is called Mula Bandha).
While closing right nostril with left middle finger exhale slowly through left nostril
After complete exhale bring come back to normal position and relax.
Repeat this inhale, exhale and relaxation steps about 10 minutes.
Throughout this breathing, keep your mouth closed.
Suggestion: While you are inhaling count to 2 and while holding breath count to 8 and while exhaling count to 4. Once you feel that you are good to perform the breathing exercise, then increase the time ratio to 4,16, 8 or 8, 32, 16. It depends on your breath holding capacity.
What other benefits you gain from Surya bedha pranayama?
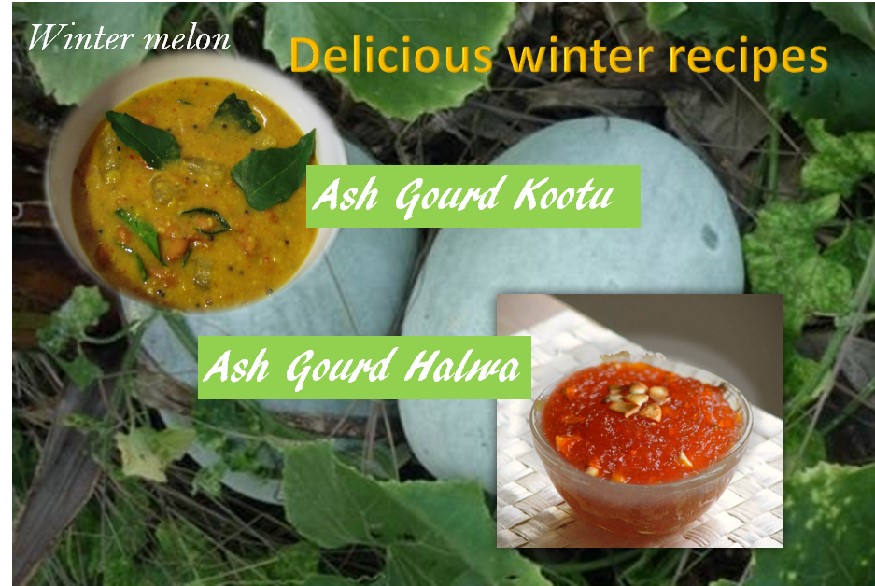
One way to keep stomach worms and stomach ulcer is consuming a good vegetable namely Ash gourd. Winter time of the year we can see Ash gourd or winter gourd often in the vegetable market. Instead of neglecting and walking away from this good vegetable, this year try these two delicious dishes namely ash gourd halwa and ash gourd kootu.
Ash gourd supplies several important nutrients to system – calcium, potassium, iron and some amount of Vitamin C. Ash gourds helps in weight control due to good amount of water content and supplies less or no calorie. Drinking ash gourd juice helps to reduce stomach ulcer. Another benefit of ash gourd is – its seeds can be used with coconut oil to control dandruff! With all these good health benefit, it has another important role in kitchen. One can prepare various types of curries and sweets using this vegetable!
Ash gourd halwaor Khashi halwa also known Dum root is a sweet dish prepared using grated ash gourd with sugar and clarified butter (ghee). It is a traditional, delicious sweet one can prepare on festival occasion. During winter eating hot khashi halwa gives a kick to the system and keeps system warm!
Ash gourd kootu is similar to sambar and is very delicious. Easy to prepare and can have with chapatti, roti and rice.
Ash gourd halwa
Ingredients:
Grated ash gourd – 8 cups
Sugar – 1 and ½ cup
Clarified butter (ghee) – 6 Tbs
Cashew pieces – 1 Tbs
Raisin – 1 Tbs
Saffron – Few strands – soak in little milk
Cardamom powder – ¼ tsp
Preparation:
Wash and peel ash gourd skin. Cut and remove seeds. Grate the amount you wanted and keep it side
After few minutes squeeze and remove water from grated ash gourd and transfer grated ash gourd to thick bottom pan.
Place the pan on medium heat and stir it. Let the remaining water evaporate from the grated gourd.
Add sugar and mix well. Continue stirring till you get thick mix.
Add saffron strands with milk, two Tbs of ghee and continue mixing. When the mix starts getting to halwa thickness, reduce the heat.
Add more amount of ghee, followed by cardamom powder. Continue stirring. After few minutes halva mix separates from the ghee. Turn of the heat.
In a frying pan take little amount of ghee and heat under low heat. Add cashew and fry to golden brown color. Add raisin and fry for couple of seconds. Turn of the heat and transfer this nut mix to halwa.
Serve hot ash gourd halva with other snacks – aloo bonda, pakora or it can be a dessert after dinner too!
Ash gourd kootu
Ingredients:
Ash gourd – ¼ kg pieces
Green chilli – 4
Grated coconut – ½ cup
Chenna daal – ¼ cup
Cumin – 1 tsp
White rice – 1 tsp (soak for few minutes)
Turmeric powder – 1 tsp
Salt – as per your taste
Small onion – 1
Mustard – 1 tsp
Curry leaves – Few
Coconut oil – 1 tsp
Preparation:
Remove ash gourd skin and seeds. Cut white pulp into small cubes
Soak chenna daal for an hour and pressure cook daal. It should be soft
Using a grinder, grind coconut, green chilli, cumin and rice to a paste.
In a deep container add little cooking oil and heat on medium flame. Add ash gourd piece and stir it for couple of minutes. Add turmeric powder, salt and little water and cook by covering the lid. Let the vegetable cook soft.
Now add cooked Chenna daal and mix well. Add grounded coconut masala mix, cut onion pieces and mix well. Boil the content for few minutes.
In a small frying pan, heat coconut oil (other cooking oil can be used to too) and add mustard and curry leaves. Pour this seasoning on top of kootu and serve kootu hot with chapatti, rice or as a side dish for lunch or dinner!
Tired of eating fruits & vegetables, try these tips
If you are fed up of eating fruits and vegetables and looking for some change in the way you consume healthy fruits and vegetables, here are few interesting and healthy alternate tips.
Use dips and spreads on cut vegetables and fruits. Use low fat cheese, pepper jack cheese, salsa or bean dip to mask the taste of fruits or vegetables.
Cut vegetables like carrot, onion, cucumber into small pieces and add it to yogurt with little salt. Give a seasoning using mustard.
Grind cucumber with green chilli and coconut. Add salt and yogurt. Consume with bread, rice or chapti.
Cut vegetables and fruits like apple, pear into small pieces. Spread them on tortilla chips or on crackers. Place cheese cubes and consume.
To avoid raw odor of vegetables, try Indian curries, stir fries. You can have these dishes with white or brown rice.
Add fruits and vegetables to smoothies. Add milk and create a thick drink. Add cocoa powder or little tobacco sauce and make it little more interesting.
Try baking vegetables and add cheese into it while baking.
Use milder tasting vegetables instead of strong vegetables for raw eating purpose. Try eating pumpkin, avocado, potato, green beans, carrots and corn.
Some does not like herb odor especially cilantro. Instead of putting cilantro at the end of dish, try frying cilantro leaves in oil while preparing seasoning.
Instead of eating individual fruits and vegetables, mix fruit varietiesand nuts.
Try mixing fruits in dishes and breakfast items – blueberries, chopped apples, and bananas in muffin, quick bread, and waffle batters.