Don't worry about the people in your past; There's a reason they didn't make it to your future.
Simple yoga poses for lung health
When our body is unable to breath properly we feel tired and exhausted. To keep lung functioning well we can make use of yoga poses and pranayama. All types of pranayama are helpful to clear the lungs and help to get back to normal breathing. Bhramari, anuloma-viloma, sheethali pranayama are proven to be very effective in curing breathing problems and asthma. Apart from breathing exercises one can practice two yoga poses to strengthen lungs.
Reclining hero pose – also known as supta veerasana in Sanskrit and saddle pose.
Reclining hero pose is an intermediate pose and needs some practice. It helps to open the lungs and nasal passages clearly. Pose also helps to improve the stretching of hip flexor, quadriceps, abdominal, feet and strengthens spine.
How to?
Sit in hero pose on the mat. Keep your upper
body straight and legs bent back at knees so that, both knees and feet are on
either side of the upper thighs.
Place your hands on either side of your hips and
begin to walk the hand backwards towards your hip/butt. Meanwhile lean your
torso back slowly.
While bringing your torso back, bend your elbows
and come onto your forearms. If you are using a folded blanket (or bolster) make
sure the blanket is of the same height in place to support your spine. This
should be your limit of bending if you are using bolster or blanket for
support.
If you are not using any props and you are
comfortable with back bend then, try continuing to release your back towards
the floor. Some yogis will reach floor
easily, for some it will take few practices.
When you bend backwards you will feel stretch in
your thighs and it is okay. If you feel pain in knees or lower back then come
out the pose slowly and hold the pose where you feel comfortable.
Keep breathing and stay in the pose for 5-6
breath. To come out from the pose, either you come on your forearm first or
slide one hand beneath the back to give support and lift yourself slowly.
Do not perform this pose if you have knee, back pain and if you are pregnant.
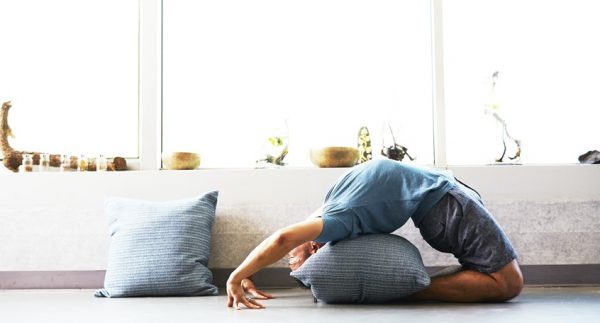
Revolved head to knee pose: Also known as Parivrutta janu shirsana in Sanskrit.
Revolved head to knee pose not only helps in strengthening lung muscle, also helps to strengthen abdomen. It is a chest opener pose that releases diaphragmatic tension and intercostals muscles. It removes tension from the waist, stretches abdominal organs and improves breathing pattern.
How to?
Sit in staff pose on the mat. Keep your right leg extended and flex the feet in front of you. Bend left knee and press the sole of into your right thigh, allowing your knee to fold out toward the floor. Try to keep the left leg glued to floor.
Inhale and lift through the torso to lengthen the spine and draw your left hand overhead.
Exhale and begin to side bend at the hip, drawing right ribs toward the right thigh and reaching for the toes. Inhale and lengthen the spine once again.
Exhale and slowly bend further forward. Try to stack the shoulders on top of each other.
Hold the pose for 5-10 deep breaths. To exit, inhale and elongate the spine while returning to an upright seated position and shake the legs.
While bending right or left side, if you feel pain and uncomfortable back off a bit.
Image credit: Photo by wee lee on Unsplash (Free for commercial use)
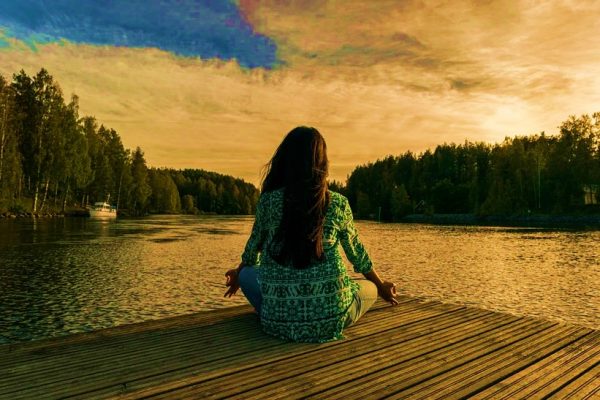
Are you trying hard to grow and maintain your hair? Are you trying new hair products and new ways to keep good hair? Try practicing yoga sequences for hair growth and maintenance. Yoga helps to keep body and mind in harmony. When our mind is in good health, our body feels energetic. Apart from good diet, shampooing, conditioning and applying oil, include yoga in your daily practice to promote hair growth.
Hair plays a major role in our appearance. Hair grows from the bottom root in hair follicle. The tiny blood vessels known as capillaries supply essential nutrients including protein to follicle root for hair growth. The living part of hair called bulb at bottom of hair made of cells and these cells divide every 23 to 72 hours leading to hair growth.
There are several conditions that make humans lose hair. Stress and improper or insufficient nutrients are two key factorsresponsible for hair loss. Practicing yoga not only helps to reduce stress, also improves blood circulation in turn provide nutrients needed for hair growth. Several yoga poses promote hair growth in different ways.
People who suffer from hair loss, tomaintain hair health, to promote hair growth and to reduce gray hair can practice next few yoga poses in sequence. This will help in blood circulation, oxygen supply, nutrient supply, stress relief and good hair growth. Apart from this, adding good diet in your daily regime is also important for beautiful hair and to maintain healthy hair.
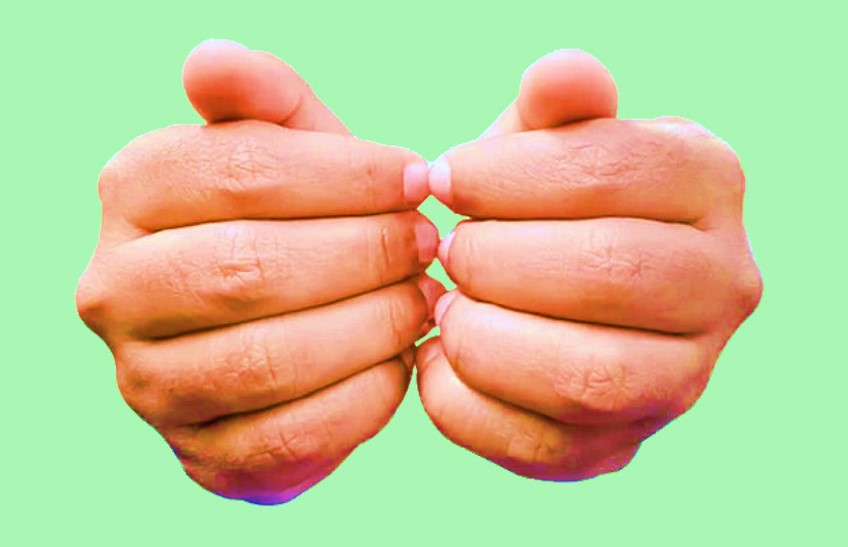
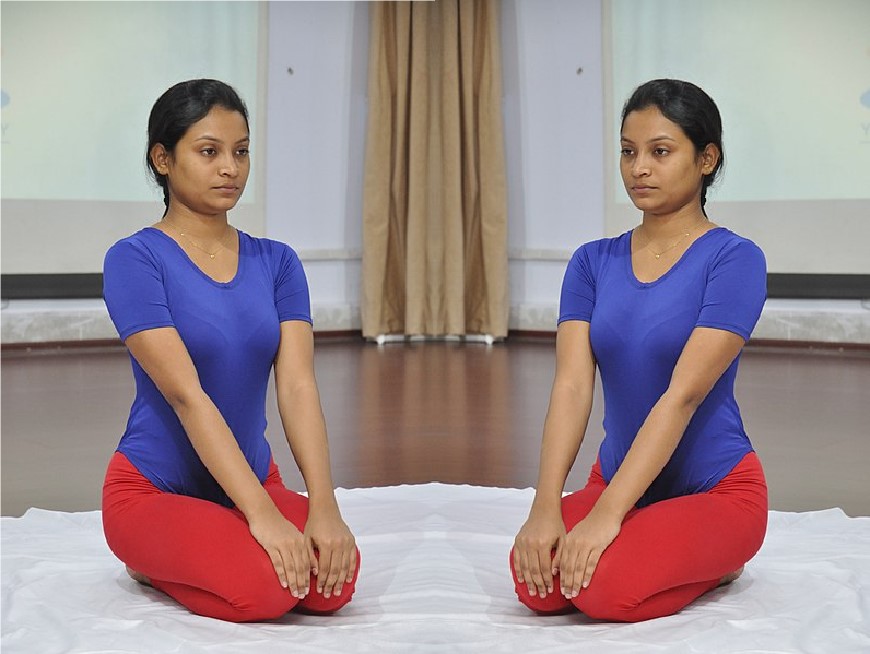
One of the popular simple and effective yoga poses that prevents hair loss and baldness. It is highly recommended for hair aliments. Bal stands for hair and vyayam is exercise. Exercising for hair is Balayam. It is combination of yoga and acupressure therapy.
How to do balayam yoga?
Sitting straight, bring hands together in front of your chest.
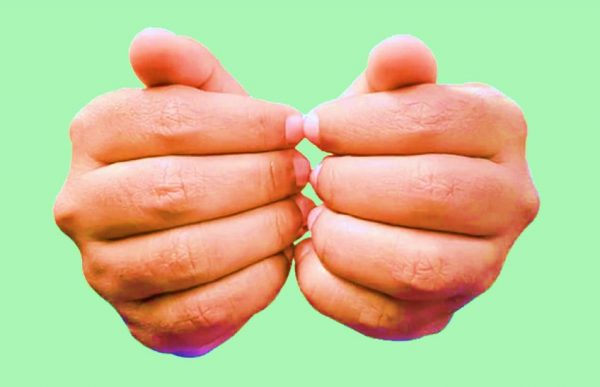
Curl your fingers so that palm will face each other, and nails should face each other.
Keep thumb sticking out as in the picture
Start rubbing the nails vigorously up-down for about 15 minutes.
Remember -Do not include thumb nails while rubbing nails.
This stimulates the scalp cells and known to boost natural hair growthand cure Androgenic alopecia or male pattern baldness. The pressure points under the fingernails puts pressure like needle pricking but without pain and inconvenience.
When one practices balayam, the nerves below nail that are connected to scalp stimulates blood flow and oxygen circulation to scalp. Rubbing fingernails helps in rejuvenating hair follicles and enhances hair growth by controlling the level of Dihydrotestosterone (DHT). This results not only in hair growth, reduces dandruff formation, helps to maintain thick, dense hair. In addition, it helps to relief headache and neurological related pain in head.
Balayam also stops early graying of hair. Practicing balayam regularly – daily 3 to 4 times at few hours intervals- for four to five months will yield the results.
Curl the fingers of both your hands inwards towards your palm.
Bring your nails in contact with each other and start rubbing them. vigorously. Ensure leaving the thumbnails out.
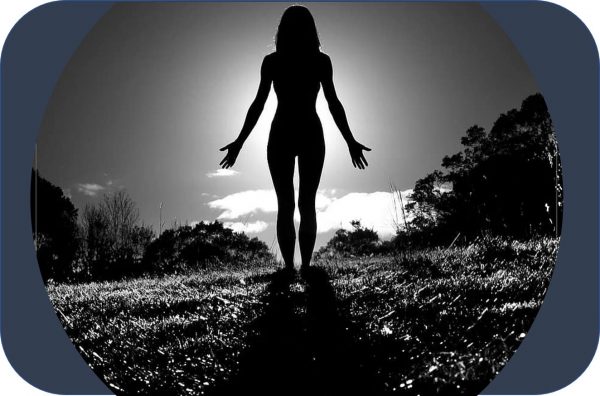
Tadasana or standing mountain pose is one the simplest pose that helps to keep good and healthy hair. It activates the entire body and stimulates internal organs. Adding namaskar by taking both handsback in this pose will help to stimulate shoulder and neck muscles and improves circulation to head region. Tadasana in any form improves respiration and digestion.
From standing, rest your arms loosely by your side
Find minor core engagement
Tuck your chin in slightly towards your chest
Lengthen your spine
Reach your arms behind you with palms facing each other
Bend your elbows and reach your fingertips towards one another
If accessible, keep your shoulders relaxed and broaden your chest as your palms meet behind your back
Rest your palms together and your pinky fingers against your spinal column
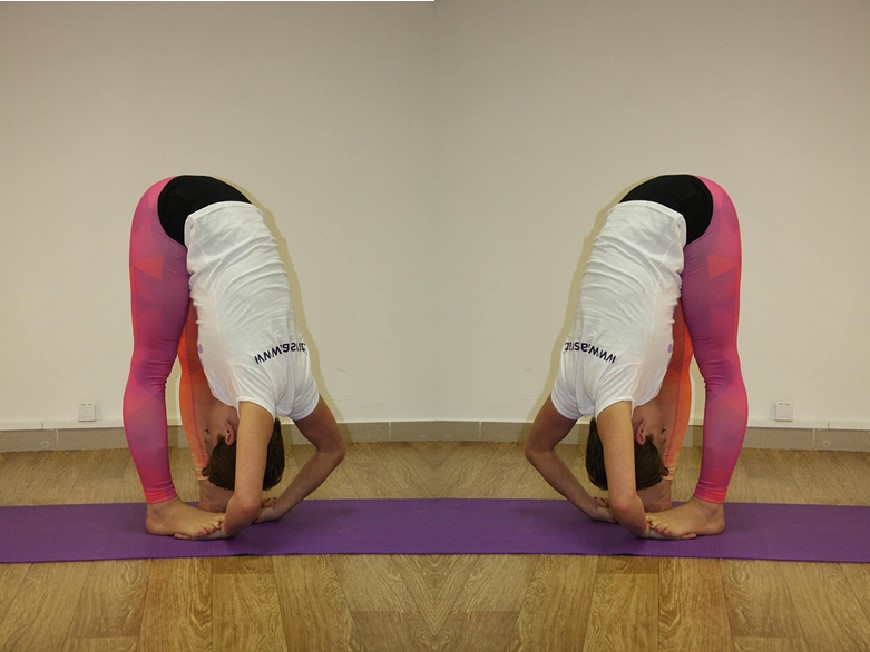
After balayam yoga, tadasana practices indlude Padahastasana – Foot Hand Forward Bend– it is an intermediate pose that helps to come out from stress. Practicing padahastana reduces insomnia and promotes sleep. Sleep deprivation is one of the major reasons many people cannot maintain existing hair and end up in hair loss and baldness.
How to do padahastana?
1. Stand in mountain pose, place hands on hips (feet together or hip width apart). Exhale and slowly hinge forward from the hip joints (not from the waist). As you bend, draw the front torso out of the groins and open the space between the pubis and top sternum. Lengthen the front torso as you move more fully into the position.
2. Bend your knees and place the hands under the feet (palms facing up), bringing the toes to meet the wrists.
3. Pull the navel into the spine and with an inhalation, straighten your arms and lift your front torso away from your thighs, creating a gentle concave in the back (Sit bones and heart lift). Hold for a few breaths, exhale and lengthen down bending your elbows out to the sides, framing the head. Lift the shoulders away from the neck and draw the shoulder blades down the back. Keep the weight evenly distributed through the feet and lift the sitting bones toward the ceiling. Turn the top thighs slightly inward.
4. With each inhalation in the pose, lift and lengthen the front torso just slightly; with each exhalation, release a little more fully into the forward bend. In this way the torso oscillates almost imperceptibly with the breath. Let your head hang from the root of the neck, which is deep in the upper back, between the shoulder blades. Stay in the position for 20 seconds.
5. To come out of the pose, release the hands. Bring the hands to the hips and inhale, come up with a neutral back.
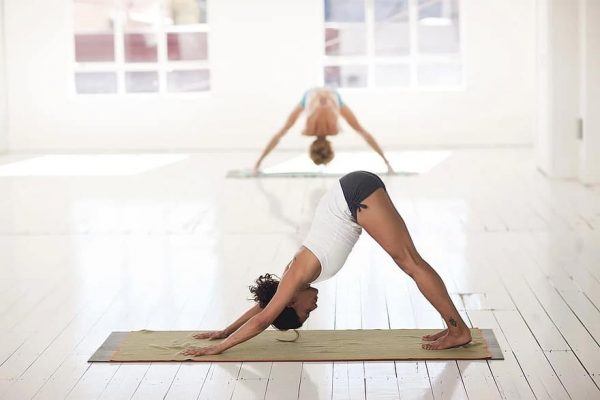
Adho Mukha Svanasana is the Sanskrit name for Downward dog pose. This pose increases blood and oxygen circulation to face and head. It helps to stimulate blood capillaries that supply food to hair follicles. To perform Downward dog pose –
Start with tabletop position.
Spread fingers and bring your wrist crease to front of the mat. Place palms on mat.
Slowly lift hips up and back while placing both feet at back of the mat. Your body should be in V shape.
Both feet should be hip distance apart and hands at should width distance apart.
Press elbows towards each other and shoulder blades against back ribs. Rotate biceps forward.
Squeeze elbows towards each other and lift the armpit.
Draw your tummy in. Slightly rotate inner thighs back, firm your quadriceps. Press heels towards floor.
Your neck should be relaxed, and head should be between two shoulders. Gaze towards feet/ankle.
Hold the post for 5-7 breath.
While performing the pose, you might notice increase in blood flow towards head.
Parvatasana: Or mountain pose is like downward dog. Only the difference is, in this posture feet placed together, and hip pulled up. This pose increases blood and oxygen circulationto capillary blood vessels and nourishes cells.
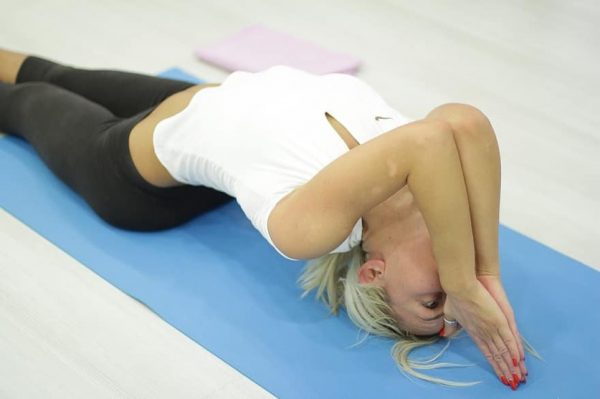
Matsyasana, the fish pose – in this pose head is bend back while lifting the chest. The arch created behind chest helps to place the back of the head on mat.
Lie flat on your back with your feet together and legs extended in front of you.
Rest your arms alongside your body.
Press your elbows and forearms into the ground, and begin to lift your chest, creating an arch in the upper back. Draw your shoulder blades together and lift your upper torso off the ground.
Tilt your head back and continue lifting your chest until you can bring the top of your head to the floor. Keep pressing through your arms. There should be very little weight resting on your head.
Keep your thighs engaged and press through your heels to lengthen the legs. Continue to deepen the arch in your thoracic spine and breathe.
Hold this pose for 15 to 30 seconds.
To release, inhale and lift your head off the floor. As you exhale, lower your head and torso to the ground. Bring your knees into your chest for a counter stretch.
Matsyasana releasesany strain on neck muscles and gives relief to the muscles surrounding the head. Releases tension in neck and back of head. It reduces respiratory issues and thus promotes oxygen circulation to head region.
After matsaysana move onto headstand or sirsasana (or shoulder stand)
Headstand pose is advanced pose in yoga. It takes several years of practice to get into the pose. If you are not comfortable then you can do shoulder stand after fish pose.
Shirsasana practice (or Sirsasana) helps in full blood circulation to head and supports total hair growth. It brings fresh oxygen and nutrients to follicle bulbs and capillary blood vessels. It reduces dandruffand helps to have clean skin in the scalp
To perform shirsasana-
Start with tabletop position.
Bring your forearms onto the mat. Keep the elbows parallel to each other.
Join the hands and interlace fingers. Now place top of your head (crown) in the cup that is formed in your palm by interlacing fingers.
Inhale and slowly lift the knee from the floor and walk feet towards elbows. You will be in V shape just like downward dog pose. Slowly lift your body – your weight will be on your forearms and shoulders.
DO NOT put weight on the neck or head. Exhale and lift feet off the floor. Slowly, steadily bring both legs towards ceiling. Arch in your feet, center of pelvis and crown of your head all should be aligned.
Hold the pose for five to seven breath and slowly come out of the pose without injuring the neck (by not putting weight on neck)
After sirsasana take a small break by getting into child pose. Then move to vajrasana.
Image credit: Image by DanaTentis from Pixabay (Free for commercial use)