


 Fusion
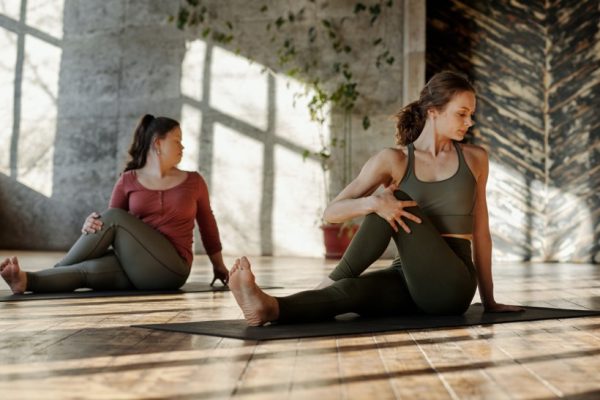
Yoga for Diabetes Patients
Yoga is science of spirituality and health both. Practicing yoga reduces stress and anxiety and improves health. For those who are suffering from diabetes yoga practice helps in improving the health condition. How yoga promotes health by controlling blood sugar level? Answer is, yoga helps in relaxation and is particularly good for stress reduction. High levels of the stress hormone cortisol can raise blood sugar levels. This can lead to more diabetes complications. Yoga can bring back the cortisol level to normal. Yoga helps us center ourselves, and centering calms us and can help keep blood sugar levels balanced. In the Journal of Diabetic research it is explained that yoga helps to improve blood sugar control, cholesterol profiles, and weight. Studies conducted also showed to lower blood pressure, enhance lung function, mood, sleep, and quality of life.
For diabetic patients yoga not only reduces the stress, it also helps in rejuvenating the organ systems that are responsible for blood sugar elevation.
The four yoga poses that are recommended for diabetes conditions are explained.
1 . Halasana (Plow pose)
How it improves health? It stimulates the pancreas, spleen and activates immune system by massaging all the internal organs including pancreas. It also rejuvenates the mind.
How to get into the pose?
- Lie on your back with your arms beside you, palms downwards.
- As you inhale, use your abdominal muscles to lift your feet off the floor, raising your legs vertically at a 90-degree angle. Continue to breathe normally and supporting your hips and back with your hands, lift them off the ground.
- Allow your legs to sweep in a 180-degree angle over your head till your toes touch the floor.
- Your back should be perpendicular to the floor. This may be difficult initially, but make an attempt for a few seconds.
- Hold this pose and let your body relax more and more with each steady breath. After about a minute (a few seconds for beginners) of resting in this pose, you may gently bring your legs down on exhalation. Avoid jerking your body, while bringing the legs down.
Precautions: Avoid this pose if you are already suffering from spinal disorders, neck injury, if you are menstruating, pregnant and high blood pressure.
- Dhanurasana (Bow pose)
How it is beneficial? Improves digestion and appetite. Improves the functioning of pancreas, liver, enzyme producing organs ,kidney and intestines. It also helps in rejuvenating reproductive organs.
How to get into the pose?
- Lie down on the abdomen .
- Fold your both knees and hold the legs just above the ankles by both the hands.
- Breathing in, lift your chest off the ground and pull your legs up and back – Look straight ahead .In this position your whole weight will come on your abdomen
- Hold this position for few seconds and continue taking a deep breath. Exhale slowly and come back to starting position.
Precaution: If you are suffering from high blood pressure, back pain, hernia, headache, migraine or abdomen surgery avoid this pose.
- Pavanamukthasana (Wind Relieving Pose)
Benefits: This is an effective exercise to cure constipation and digestive disorders. It cures indigestion and promotes digestive function. It releases strain on abdominal organs and strengthens abdomen, releases gas from the system and aids in digestion.
How to get into pose?
- Lie flat on your back and keep the legs straight and breath deeply.
- Inhale slowly and lift the legs and bend in the knee. Bring upwards to the chest till your thigh touches to stomach.
- Hug your knees in place and lock your fingers.
- Try to touch the knee with your nose tip. Hold this position for few seconds.
- Now exhale slowly and come back to the initial position.
Precaution: Avoid this asana in high blood pressure, slip disc, and pregnancy.
- Ardha matsyendrasana ( Half spinal twist)
Benefits: This pose is a boon for diabetic patients. This pose helps in secrete more insulin as it stimulates pancreas. It also opens the chest and increases the oxygen supply to the lungs.
How to get into the pose?
- Sit on the ground with spreading your legs in front of you.
- Bend your left leg so that the left foot comes close to your hips while the right foot is placed outside the left knee.
- Place the left arm over the right knee and grasp the toes of the right foot with the left hand.
- Now, put your right arm behind back around the waist in order to touch the navel from behind.
- Try to look behind by turning your head towards right side.
- The same thing should be repeated from the other side
- Hold and continue with gentle long breaths in and out.
- Breathing out, release the right hand first (the hand behind you), release the waist, then chest, lastly the neck and sit up relaxed yet straight. Repeat to the other side.
- At the end, breathing out, come back to the initial stage and relax.
Precautions: Avoid this asana in spinal injuries and back pain. Twist your spine as per your flexibility
Image credit: Photo by Cliff Booth from Pexels (Free for commercial use)
Author: Sumana Rao | Posted on: December 8, 2022
« Previous Article
Next Article »
« Practice Urdhva Hastasana Upward Salute Pose For Stress Free Day Learn To Take Care Of Your Yoga Mat »
« Practice Urdhva Hastasana Upward Salute Pose For Stress Free Day Learn To Take Care Of Your Yoga Mat »


Write a comment