Don't worry about the people in your past; There's a reason they didn't make it to your future.
Cherry allergy
Cherries are eaten fresh and are ingredients of bakery items, jams, jellies, juices, ice cream and preserves.
Cherry allergy also takes two different forms. In north of Europe a milder form of cherry allergy that is like birch-tree pollen allergy occurs in individuals. It is because of cherry protein. Reactions can be seen in mouth and throat resulting in OAS and the allergen does not survive cooking.
In Mediterranean countries, cherries can cause adverse reaction by causing abdominal pain, vomiting and life-threatening symptoms associated sometimes with OAS. In this type, allergens survive pasteurization and cooking. Individuals who has develop these symptoms should not eat fresh or baked/cooked cherry.
Individuals with cherry allergy might develop adverse reactions when consumed cherry with other fruits including apple, pear, apricot, nuts such as hazelnut, or vegetables such as celeriac (celery tuber) and carrot.
Image credit: https://pxhere.com/en/photo/591932 (CC by 0)
Kiwi fruits are present in syrups, baked goods, fruit shakes and cocktails, as dry fruits, ice cream, yogurt, puddings, cereals etc.
Kiwi fruit allergy normally occurs in children and in adults. Kiwi allergy is similar to latex fruit allergy symptoms. People might also develop OAS. Most reactions of Kiwi fruits are limited to inflammation and itching of mouth and throat. Individuals may develop harsh reactions such as difficulty in breathing, anaphylactic shock and death!
Kiwi becomes prevalent allergen when it cross reacts with other food substances including birch pollen, banana, rye grain and hazelnuts.
Kiwi allergy was first reported in 1981 and since then have become one of the most common allergies in Europe and America. Some suspect that where there is more birch there is likely to have more kiwi allergy. Few varieties of kiwi like gold kiwi marketed as Zespri Gold contain less allergen. Still people who are allergic to green kiwi fruits can show reaction to gold kiwi fruits.
Image credit: https://pxhere.com/en/photo/1456339 (cc by 0)
Peach is eaten fresh as fruit and is ingredient of juices, jams, jellies and preserves. Fruit is juicy as nectarine and delicious to eat.
Like other fruit allergies – peach allergy can also take 2 different forms that lead to birch tree pollen allergy symptom within 5 to 15 minutes of consumption of peach fruit. This results in OAS and inflammation, wheezing, nasal congestion.
And, second one is latex allergy, when people eat peach with peel it causes reaction- abdominal pain, vomiting, life threatening symptoms.
People (especially in Europe) who develop reactions to peach allergen can tolerate cooked peach and juices when they have OAS symptoms. Individuals often develop adverse reaction to other fruits with peach – apple, pear, cherry, banana and melon.
Image credit: https://pxhere.com/en/photo/572948 (cc by 0)
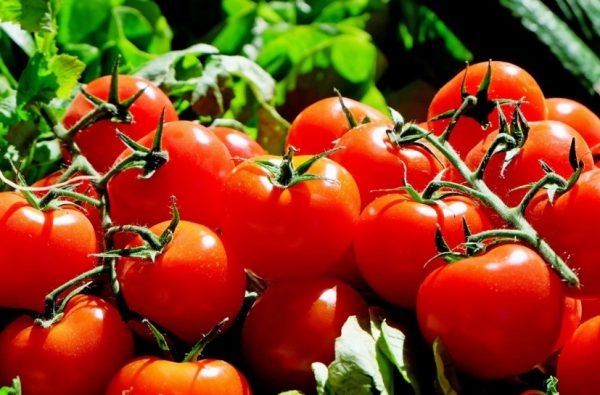
Tomato is one of the most loved food and is used in salads, as vegetables, curry base, stews, soups, pizzas, chutney, pickle etc.
Tomato belongs to nightshade or Solanaceae family. Members of this family often contains alkaloids that are irritant to people. Cultivation of tomato also involves pesticide spraying and that results in tomato intolerance symptoms. This is the reason people remove tomato skin before consumption.
Tomato allergy and tomato intolerance are two different reactions individuals can have. Tomato allergies occur fast and symptoms appear immediately after consuming fruit or as ingredient. Tomato intolerance timings depends on amount eaten and on individual. Tomato allergy can happen to an individual just by touching fruit. It provokes reaction.
Two types of allergies are:OAS and skin reactions due to latex type allergy. It results in stomach bloating, pain, diarrhea, skin rash, tingling in lips, itching, tiredness, aches and pains. Allergy to tomato is also cross linked to allergy to potato since they are related plants.
If you have tomato allergy or tomato intolerance it is worthwhile cutting it from diet – do watch severity of reactions and restrict tomato use.
Image credit: https://pxhere.com/en/photo/1221993 (CC by 0)
Pear is present in juices, jams, jellies, preserves and eaten as fresh fruit.
Like other fruit and vegetable allergies, pear allergy also takes two forms. In North Europe birch pollen allergy symptoms with OAS prevails. Individuals often develop reactions to other cross fruits – apple, apricot, cherry, banana, hazelnut, celeriac and carrot. Itching, burning, swelling of lips, throat inflammation, rashes and OAS can happen to individuals with pear allergy. Cooked pear is safe but not raw and fresh.
Latex allergy type with generalized urticaria, abdominal pain, vomiting and other life-threatening symptoms occurs in Mediterranean countries. Stomach cramps and vomiting may be strong and come on suddenly. Patience may experience diarrhea. Symptoms are like those of food poisoning. These individuals cannot eat cooked pear too.
In babies pear allergy symptoms include – runny nose, itching and rashes, voice change, swelled eyes, inflammation of body parts and blockage of arterioles. Be careful when you buy baby food containing pear.
Image credit: https://pxhere.com/en/photo/121232 (cc by 0)
Grapefruit eaten raw, pudding, jam and juice form.
Although the fruit is famous for weight reduction one should be careful while eating this fruit.
It causes allergy in individuals. Reactions happens within few minutes of eating this citrus fruit and symptom include: Asthma, hives, itching, inflammation, anaphylaxis.
Apart from above symptoms – in adults it causes allergy diarrhea and stomach pain. Another side effect of grapefruit is – it causes adverse reactions if someone is eating grapefruit or drinking grapefruit juice with medications for cancer or asthma.
The chemicals present in grapefruit interfere with body’s ability and affects metabolism of the medication. It causes devastating side-effects ranging from stomach bleeding to kidney problems, muscle aches and irregular heartbeats.
Image credit: https://pxhere.com/en/photo/1633232 (cc by 0)
Are you craving for something slightly spicy and cheesy for cold weather? Here is one easy recipe for you – Jalapeno pepper filled with vegetarian cream cheese. If jalapeno is not available, use less spicy fat green chili varieties available in your local produce farmers’ market.
Ingredients:
Jalapenos -10 to 12
Vegetarian cream cheese
Cumin powder – 1 tsp
Pepper powder -1 tsp
Chilli powder – 1/2 tsp
Little salt
Method:
Wash Jalapenos
Cut in half down the middle or cut jalapeno into half
Take out seeds
Fill vegetarian cream cheese or vegetarian cheese, cumin powder and pepper powder
Sprinkle salt
Bake on pan or in oven at 400 F for about 10 minutes until the cheese slightly burns
The cost of our utility bills always seems to be on higher side. If you sit and argue with utility company, they might say your usage is high. Consider taking few steps to save energy and money by taking simple steps.
If you have not already, then change light bulbs to LEDs. According to ‘Nationalgrid to save energy-
Replace outdated lighting with ENERGY STAR® certified lights, which last up to 25 percent longer and use up to 90 percent less electricity than older incandescent bulbs.
Make use of natural light sources during daytime hours with blinds and skylights.
Turn your lights off during the day, which can save up to 40 percent.
Use dimmer switches to save energy and change the mood in a room.
If you are living in cold regions and where winter is harsh, look at home- Air seal home, seal cracks, leaks and gaps. Add insulation that helps you to save money on cooling and heating costs.
Conserving water is good way to save both money and energy. To conserve water and to lower water bill:
Stop leaks. Repairing even small leaks saves liters of water and money each month.
Install water-saving faucets and low-flow showerheads.
Set a maximum hot water heater temperature of 120° F.
Upgrade your water heater to a high-efficiency model.
Use dishwashersand washer at nighttime. This not only keeps house cool, also reduces load on power grid.
Consider putting clothes for drying in Sun light instead of using dryer.
Use air dry option for dish drying instead of heated dry.
Dress according to the seasons. Winter weather means warmer cloths, summer means comfortable clothes that helps to keep body cool. This will reduce running cost of heater and air conditioner.
Defrost freezer and refrigerator before ice builds up. This will help the machine to run efficiently.
Do not keep refrigerator empty. Store food and water bottles. When occupied fridge will operate efficiently. However, do not overload your refrigerator. It causes less airflow and machine will work hard.
Clean all filters at home, replace the one that are dirty. Clogged filters will make heater run hard.
During summer, keep blinds, curtains down on windows to keep house cool. If you have a basement, consider using it during summer to keep your body cool.
To control amount of energy supply to electronics that you use, take help of smart power strips If you don’t have power strip, unplug the electronics when you are not using.
When not in use unplug chargers. Keeping chargers plugged in will still draw energy.
Adjusting TV display setting to low power use mode without compromising picture quality will help.
During winter set thermostat between 67-69 F and Summertime between 72-74 F. Every degree of cooling or heating increases energy use by 6 to 8%.
Don’t leave phones charging overnight. Phones and activity trackers like Fitbit need only couple of hours to charge 100%.
Use ceiling fan or table fan to keep cool is a good idea to save money.
You can also introduce solar panel at your home. This could save you big chunk of money (check whether any subsidy is available)
Consider adding a reflective roof coating that can help improve energy efficiency.
Do you know? Every time you peek inside oven by opening the door, while baking could end up in more energy usage. It means you will lose temperature while peeking and to raise temperature you need more energy.
Keep manufactures temperature recommendation for refrigerator to avoid energy wastage.
Use photocell fixture or a timer to operate outdoor lights.
Turn off lights when you don’t need them. Your utility costs depend on consumption of light.
Get used to natural light as much as possible. Keep windows open. Let the Sun rays come inside house.
Buy energy saving appliances if you don’t have one. You can trade old for new energy efficient appliances.
Also read article: https://healthylife.werindia.com/online-grandma/grandma-tips/tips-to-minimize-energy-usage
Image credit: Image by kalhh from Pixabay (Free for commercial use)