All posts by Sumana Rao

Don't worry about the people in your past; There's a reason they didn't make it to your future.
Practicing Kegel hold

Practicing Kegel Hold Everyday Helps To Improve Bladder, Bowel And Pelvic Health

Kegel hold also known as Kegel exercises, involves contracting and relaxing the pelvic floor muscles, offer numerous benefits for elderly individuals, particularly in terms of improving bladder control, enhancing bowel function, and supporting overall pelvic health.

Practicing Kegel hold helps all, especially those who are aged 40 and over in many ways. Kegel hold also helps new mothers who have given birth recently.

1. Improved bladder control

  • Urinary incontinence: As people age, bladder muscles weaken, leading to urinary incontinence or loss of bladder control. Kegel exercises help strengthen the pelvic floor muscles, which support the bladder, leading to better control and reduced leakage.
  • Prostate health in men: Elderly men, especially those who have had prostate surgery, may experience issues with bladder control. Kegel exercises can improve urinary retention and reduce post-surgical incontinence.
  • Signs of bladder performance improvement in adults:
    • Longer time between your restroom visits
    • Not too many accidents
    • Ability to hold the urge.
    • You will feel dry underwear instead of always being wet.
    • Getting good sleep during night

2. Enhanced bowel function: Weak pelvic floor muscles may contribute to fecal incontinence. By strengthening these muscles, Kegel exercises can help improve bowel control, leading to fewer accidents and more predictable bowel movements.

3. Support for prolapsed organs: Pelvic organs prolapse, where organs such as the bladder, uterus, or rectum drop from their normal position due to weakened muscles, is more common in older women. Kegel exercises can help prevent or reduce the severity of prolapse by strengthening the muscles that hold these organs in place.

4. Improved sexual health: Kegel exercises can enhance sexual health in both elderly men and women by increasing muscle tone in the pelvic floor, which may lead to improved sexual function and sensation.

5. Promoting posture and stability: A strong pelvic floor can also improve core stability and posture, reducing the risk of falls in elderly individuals by providing better support for the spine and lower body.

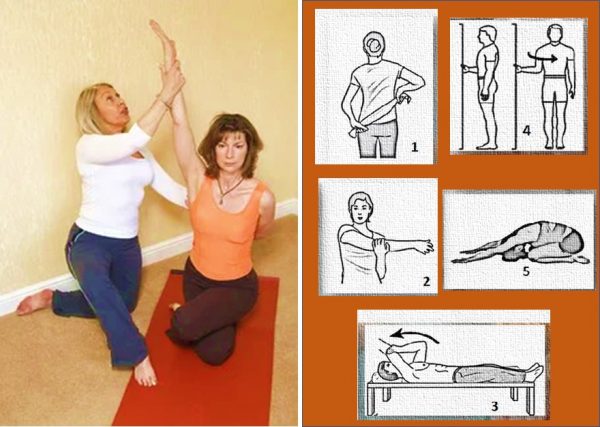
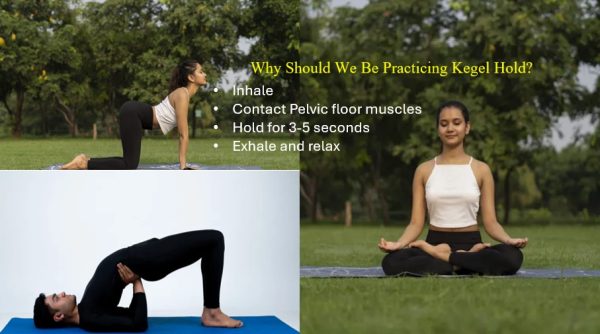
Instructions to Kegel exercise practice: It is essential to identify the muscles that you need to hold before practicing Kegel hold.

  1. Find a comfortable position:
    • Start by sitting or lying down in a comfortable position. You can also stand if that is easier for you. In the beginning, lying down might help you feel the pelvic floor muscles better.
    • If you are familiar with Bridge pose or Sethu bandhasana then, you can practice Kegel hold while you are performing the bridge pose.
  2. Identify Your pelvic floor muscles:
    • To locate the pelvic floor muscles, imagine you are trying to stop urination midstream. Those are the muscles you will be working on. (Do not regularly stop urination while doing Kegels; this is just to help identify the muscles.)
  3. Contract the muscles:
    • Once you have identified the muscles, squeeze and hold them for 3-5 seconds. Try to avoid tightening your thighs, abdomen, or buttocks—focus only on the pelvic muscles.
  4. Relax:
    • After holding for a few seconds, fully relax the pelvic muscles for 3-5 seconds before contracting again.
  5. Repeat:
    • Aim for 10-15 repetitions per session, 3-4 times a day.

How to visualize Kegel hold during practice?

Watch this video: How To Do A Kegel Exercise – Step By Step Instructions – YouTube

Imagine the pelvic floor muscles as a hammock holding your pelvic organs.

Relaxed state: In this state, the pelvic floor muscles are at rest, supporting the bladder, uterus (in women), and rectum.

Contracting (Kegel): Tighten the muscles that would stop urination. Think of lifting the muscles upward and inward, like pulling the hammock up. This motion strengthens the muscles.

Relaxing: Release the contraction and let the muscles return to their resting position. Repeat this process.

Kegel exercises are discreet and can be done anytime, making them especially beneficial for older adults who want to maintain their independence and quality of life. Do not overdo Kegel hold as it could lead to pain in pelvic muscles. Practicing 2 to 3 times a day will improve the performance of your pelvic muscles.

Image credit: 3 images by Akshay Gupta, https://pixahive.com/photo/dvapada-dhanurasana-bridge-pose-on-elbows-3/


Author: Sumana Rao | Posted on: November 13, 2025
« »
« »

Recommended for you

Ragi Makhana smoothie

Healthy Delicious Makhana Ragi Smoothie Recipe

Two healthy ingredients and some other goodies will make a delicious smoothie. We are talking about Makhana and Ragi. Makhana is product of Lotus seeds and Ragi is healthy millet. Ragi huri hittu or ragi flour mixed with roasted makhana and selected dry fruits can be made into smoothie.

Drinking this smoothie gives energy and strength as it supplies necessary minerals and vitamins that our body needs.

Makhana and ragi smoothie recipe

Ingredients:

  1. Ragi huri hittu or ragi flour – 2 Tbsp.
  2. Roasted makhana – 1cup
  3. Soaked almonds -5
  4. Apple – ½ cup (or fruits of your choice- blueberry, strawberry etc.)
  5. Dates -4-5
  6. Cardamom powder – little

Preparation:

  1. You can by dry roasted ragi hurihittu from shop or use ragi flour. If you are using ragi flour dry roast it for a minute or so.
  2. Dry roast makhana for couple of minutes.
  3. You can use sliced almonds or soak almonds well before.
  4. Add ragi huri hittu, roasted makhana, soaked almond, cut apple (or any fruits), dates and cardamom powder to a blender. Run the blender and prepare smoothie,
  5. You can keep smoothie in refrigerator for few minutes if you prefer having cold smoothie, or can drink immediately.

Image credit: Generated by AI Copilot 11-11-2025


Author: Sumana Rao | Posted on: November 11, 2025
« »
« »

Recommended for you

Red onion shampoo

Why Red Onion Is Good For Hair Health

Apart from adding delicious taste to the dishes, red onion also has become a common ingredient in commercial and homemade shampoo and conditioners. Red onion shampoo and conditioner has gained popularity for its potential benefits for hair health, due to the following properties of red onions that support hair health.

How does red onion promote hair health?

  1. Promotes hair growth: Red onions are rich in sulfur, a key component of amino acids needed for protein building. Our hair strands are made of keratin and our scalp contains collagen – both are proteins. Sulfur is essential for the formation of both proteins. Sulfur in red onions helps to nourish hair follicles, stimulate blood circulation to the scalp, elasticity of the hair strands and promote hair growth.
  2. Reduces hair fall: The sulfur in red onions helps strengthen hair strands and reduce breakage and thinning. Improved blood circulation also nourishes the scalp, preventing hair fall caused by weakened follicles.
  3. Adds shine and softness: Red onion shampoo can help improve the overall texture of hair by making it smoother and shinier. The antioxidants in red onions neutralize free radicals, preventing damage and maintaining healthy hair.
  4. Fights dandruff and scalp infections: Red onions have antibacterial and antifungal properties, which can help combat dandruff, scalp infections, and fungal growth. Using red onion shampoo regularly can help keep the scalp clean, reduce flakiness, and prevent itching.
  5. Balances scalp pH and improves scalp health: Red onions contain compounds that help balance the scalp’s pH, reducing excessive oil production and maintaining a healthy environment for hair growth.
  6. Reduces premature graying: Red onions contain antioxidants such as flavonoids and quercetin, which help protect hair from oxidative stress. This can reduce the risk of premature graying and maintain natural hair color.
  7. Improves hair thickness: The nutrients in red onions, including vitamins C, B6, and folate, help in improving the thickness and volume of hair by nourishing hair follicles and promoting healthy hair growth.
  8. Natural conditioner: Red onion shampoo often has conditioning properties, making hair softer and more manageable, reducing frizz and dryness.

How to use red onion shampoo?

  • Apply generously: Use enough shampoo and gently massage it into your scalp and hair for few minutes.
  • Leave it on: Allow the shampoo to sit on your scalp for 2-3 minutes to let the nutrients penetrate the hair follicles.
  • Rinse thoroughly: Rinse your hair thoroughly with lukewarm water to remove all the shampoo.
  • Condition: Follow up with a conditioner for additional moisture and softness.

Things to keep in mind:

  • Check for allergies: If you have sensitive skin, do a patch test before using red onion shampoo, as it may cause irritation for some people.
  • Choose quality products: opt for shampoos that contain natural red onion extract and avoid those with harsh chemicals, parabens, or sulfates.

Recipe for homemade red onion hair treatment:

Making a homemade red onion hair treatment is simple and effective. You can use fresh red onion juice to promote hair growth, reduce hair fall, and improve scalp health.

Ingredients:

  1. 1–2 medium-sized red onions (depending on hair length)
  2. Few drops of essential oil (optional, such as lavender or rosemary, to mask the onion smell)
  3. One tablespoon of coconut oil or olive oil (optional, for added moisture)

Preparation:

  1. Onion juice: Peel the red onions and chop them into small pieces. Blend the chopped onions in a blender or food processor until you get a smooth paste. Strain the onion paste using a fine mesh sieve, cheesecloth, or a muslin cloth to extract the juice. Squeeze out as much juice as possible.
  1. Add essential oils (optional): Add a few drops of your preferred essential oil (like lavender, rosemary, or peppermint) to the onion juice. This helps to mask the strong onion smell and adds additional benefits like soothing the scalp and promoting hair growth.
  2. Mix with carrier oil (optional): If you have dry hair or a sensitive scalp, you can mix the onion juice with one tablespoon of carrier oil such as coconut oil, olive oil, or castor oil. This will provide extra moisture and nourishment.
  3. Application: Apply the onion juice mixture directly to your scalp using a cotton ball or using your fingertips. Gently massage it into your scalp for 5–10 minutes to ensure it penetrates the hair follicles. Make sure to cover all areas of the scalp thoroughly.
  4. Leave it on: Leave the onion juice on your scalp for at least 30 minutes to 1 hour. For better results, you can cover your hair with a shower cap to allow the juice to penetrate deeply.
  5. Rinse and wash: Rinse your hair thoroughly with lukewarm water. Then, wash your hair with a mild shampoo to remove the onion juice completely. You may need to shampoo twice to eliminate the smell. You can also apply the juice along the length of your hair for added benefits.
  6. Condition your hair. Use conditioner to moisturize and soften your hair.

Tips to use homemade onion juice hair treatment:

  • Frequency: Use this treatment 1–2 times a week for the best results.
  • Patch test: Always perform a patch test before applying onion juice to your entire scalp to check for any allergic reactions or irritation.
  • Consistency: Regular use over several weeks or months required to notice significant changes in hair growth or thickness.

Image credit: Image by Leopictures from Pixabay (CC by 0) & Image by Mohamed Hassan from Pixabay (CC by 0)


Author: Sumana Rao | Posted on: November 7, 2025
« »
« »

Recommended for you

Isha Singal chemical free living

A Mother’s Journey From Amazon Programming To Chemical Free Lifestyle

Chemical-free and natural farming is an ecological approach to agriculture that focuses on working with nature rather than against it. Instead of relying on synthetic fertilizers, pesticides, or genetically modified seeds, natural farming nurtures soil health through compost, cow dung, green manure, and crop rotation. It encourages biodiversity by integrating trees, animals, and multiple crops in the same space, creating a self-sustaining ecosystem where pests are managed naturally and soil fertility improves over time. This method not only produces nutrient-rich food but also protects water sources, pollinators, and the overall environment. Chemical-free farming is rooted in the belief that healthy soil leads to healthy plants, animals, and people—making it both a sustainable and ethical alternative to industrial agriculture.

Isha Singal worked as a Senior Program Manager at Amazon and was involved in tech deployment work. She began worrying about the food her children and family were eating — especially packaged/ready meals wrapped in plastic and laden with chemical residues.

That concern prompted her to buy a farm outside Bengaluru (about 3.5 acres, 65 km from the city) in 2024 to try growing food with fewer or no chemicals.

How did Isha achieve chemical-free and natural-farming lifestyle?

Learning about natural farming & permaculture

  • She was introduced to a natural farming/permaculture approach (via Binay Kumar of The Art of Living Foundation, Bengaluru) and attended a workshop.
  • Permaculture explicitly changes the way you view land—with zones, ecosystem design, and minimal reliance on synthetic inputs.

Designing the farm as an ecosystem rather than a mono-crop chemical farm-

  • The barren land was initially devoid of ecosystem. She and her team designed it into multiple zones (fruit trees, vegetables, grains, etc.).
  • They planted ~600 trees of mango, coconut, guava, bananas, oranges, lychee, rambutan, dragon fruit, and more (in total ~70 varieties).
  • Under-planting between the trees: vegetables and spices like ridge guard, lady finger (okra), chilly, tomato, turmeric.

Using non-chemical fertilizers / inputs, relying on nature’s balance-

  • Instead of synthetic fertilizers / pesticides, she used green manure (“Navdhanya” or nine types of seeds), cow dung manure, and other natural soil-building methods.
  • Over time, the ecological balance developed: birds came, snakes came (helping with pests/rodents), pests were fewer — Isha says “you don’t need chemicals to maintain a thriving ecosystem built from nothing.” (Krishi Jagaran)

Shifting mindset around food consumption-

  • Beyond the farm, her family became more conscious about which produce to buy and which to avoid (e.g., certain leafy greens, grapes which are heavily sprayed).
  • Her children are involved in harvesting and connecting with nature on the farm.

Chemical-free living -at least as a goal, is more than just swapping products — it often involves systems thinking (soil health, diversification, ecosystem support) rather than simply “don’t use the pesticide so and so.”

Transitioning from a conventional career lifestyle to a chemical-free farm required Isha to learn new farming knowledge, change mindset, and design intentionally. The emphasis is on building resilience and balance in the ecosystem (rather than fighting pests with more chemicals). Her efforts also involved clear understanding of the origins of produce, inputs used, packaging etc.

It is incremental — Isha’s story still shows she buys some external produce, but overall shifting strongly toward safer, more natural sources.

Reference:

  1. https://krishijagran.com/success-story/from-coding-to-growing-food-a-mothers-journey-to-chemical-free-living/
  2. https://toxinfreeish.com
  3. https://www.greenlivingnow.com/the-conscious-womans-guide-5-steps-to-a-toxin-free-home-lifestyle
  4. Image credit: Image by Couleur from Pixabay (Free to use under Pixabay content license)

Author: Sumana Rao | Posted on: November 6, 2025
« »
« »

Recommended for you

Measles in children

How To Protect Kids From Measles Infection?

Measles are one of the highly contagious diseases and children are more vulnerable to measles. Measles contagious viral disease that affects children but can also occur in unvaccinated adults. It spreads easily through coughing and sneezing and can stay active in the air or on surfaces for several hours. Parents need to protect their children form Measles as it can be painful and make children extremely sick. Measles can be transferred from one child to another before 4 days of onset of rash symptoms and after 4 days.

Parents might think measles are just rash and clears within few days – which is not true. Measles can cause serious complications. According to CDC as of October 28, 2025, a total of 1,648 confirmed measles cases were reported in the United States alone.

What are general symptoms of Measles?

When measles infection happens – a child will show following symptoms:

  1. Tiny white spots inside the inner lining of cheek called Koplik’s spots.
  2. Coughing
  3. Runny nose
  4. Sore throat
  5. Conjunctivitis or red eyes
  6. Red spots or rash in the skin- starts in head region and spreads throughout the body.
  7. Red rashes might raise and form blotchy patches on skin.
  8. High fever
  9. Indigestion causing diarrhea.
  10. Vomiting
  11. Ear pain

Other complications that can arise from Measles:

  1. Encephalitis – Irritation and swelling in brain.
  2. Weakened immunity.
  3. Pneumonia- 1 out of every twenty children will get pneumonia and can lead to death of the child.

An expectant mother who develops measles can end up with premature birth of the baby with low weight and sometimes it could lead to fetal death.

Preventing Measles in children:

Best prevention and protection measures in children is to get recommended doses of MMR or MMRV vaccines.  

The MMR vaccine is a combination vaccine that protects against three viral diseases: measles, mumps, and rubella. One dose of MMR vaccine is 93% effective in preventing measles and two doses effective at 97%.

When to give Measles vaccination?

  1. First dose between 12 to 15 months age
  2. Second dose at age of 4 to 6 years
  3. If child missed the vaccination catch up with vaccination at any age.

Precautions and care for children:

1. Keep immunization records updated: Make sure your child’s vaccination record is complete, especially before travel or school enrollment.

2. Prevent exposure:

  • Avoid contact with anyone showing symptoms of measles.
  • During outbreaks, they keep unvaccinated children away from public gatherings.

3. Good hygiene habits

  • Teach children to cover coughs and sneezes.
  • Wash hands regularly with soap and water.
  • Disinfect commonly touched surfaces.

4. Healthy immune support: A strong immune system helps recovery and reduces severity:

  • Provide a balanced diet rich in vitamins A, C, and D, and zinc.
  • Ensure enough rest and hydration.

When to seek medical help?

Call a doctor immediately if your child:

  • Has a high, persistent fever
  • Shows difficulty breathing or confusion.
  • Is not drinking fluids or seems unusually sleepy.
  • Develops a rash after exposure to someone with measles.

Remember: Measles are highly contagious because if one child gets infected, it can transfer and make 9-10 children sick too.

Image credit: US Government department: Public Health Image Library, Centers for Disease Control and Prevention (Copyright free)


Author: Sumana Rao | Posted on: October 31, 2025
« »
« »

Recommended for you

Frozen shoulder

Frozen Shoulder

Frozen shoulder is a condition in which shoulder joint stiffens and significantly diminishes the range of shoulder movement. The inflammation of the muscle tissues around the shoulder joint makes it stiff and restricts stretches and other movements of shoulder. This is also known as adhesive capsulitis as adhesion forms sticking the joint surfaces and decreases the space available for lubricating joint fluid.

Facts about frozen shoulder: There are 3 types of frozen shoulder based on the symptom severity

  • Freezing, or painful stage: The shoulder becomes stiff and then very painful with movement. Movement becomes limited. Pain typically worsens at night.
  • Frozen, or adhesive stage: The shoulder becomes increasingly stiff, severely limiting range of motion. Pain may not diminish, but it does not usually worsen.
  • Thawing stage: Movement in the shoulder begins to improve. Pain may fade but occasionally recur.

Frozen shoulder occurs in people who are in the age group 40 to 60. Some of the conditions that can be responsible for this condition include :

  • Previous injuries that could have been a cause of immobility and pain,
  • rotator cuff tendonitis
  • rheumatic disease
  • shoulder surgeries
  • Conditions like diabetes, hypothyroidism or hyperthyroidism
  • Parkinson disease
  • Exercise injuries
  • Stroke and open heart surgery
  • Certain medical treatment side effects – such as antiretroviral used in HIV treatment
  • Spine injury and limited movement of hands due to pinched nerves

Symptoms:

  • Pain and stiffness in shoulder
  • Limited activities of shoulder
  • Pain in shoulder while performing normal, everyday work – wearing shirt, taking bath, brushing, coming hair, folding cloths, lifting light weights etc.
  • The dull pain often worsen at night resulting is sleeplessness
  • Cannot sleep on one side of the body that hurts shoulder

Diagnosis: Diagnosis for this condition is clinical. And based on the symptoms one have doctors will suggest further test including X-ray, MRI, arthroscopy, blood tests etc.

Treatment: Restoring shoulder movement is the main goal of the treatment.

  • Gentle shoulder exercises are recommended. Physiotherapist, based on your shoulder degree of movement will help to perform several exercises. This include: passive stretching by physiotherapists and weighted pendulum exercises.
  • Anti-inflammatory medicines that are non-steroidal will help to reduce pain caused by inflammation.
  • Some doctors recommend cortisone (orally or injected)
  • TENS is Transcutaneous electrical nerve stimulation helps to bring relief by blocking pain impulses.
  • Manipulation of shoulder under local or general anesthesia is one of the option if other treatments does not help.
  • In special cases doctors, may recommend surgery of incising ligaments and removing any visible scar tissue
  • Shoulder arthroscopy: This is a minimal invasive surgery where a small endoscope, is inserted through a small incision into the shoulder joint to remove any scar tissue or adhesions.
  • Never sleep on the side of the shoulder that is frozen as it increases pain. Do not use a pillow and soft mattress if you have frozen shoulder.
  • Garlic and mustard oil therapy: Crush 2 or 3 garlic cloves and add to mustard oil. Cook this mix for five minutes on low heat. Remove and apply the oil mix to shoulder and massage in circular motion.

 Exercises for frozen shoulder:

  • Towel or strap stretch – By holding towel in both hands at the ages move the arm up and down at back. This stretches the shoulder.
  • Crossover arm stretch. Gently pull one arm across your chest just below your chin as far as possible without causing pain. Hold for 30 seconds. Relax and repeat.
  • Forward flexion — supine position. While sitting straight or lying on your back with your legs straight- Use your unaffected arm to lift your affected arm overhead until you feel a gentle stretch. Hold for 15 seconds and slowly lower to start position. Relax and repeat.
  • External rotation — passive stretch. While standing in a doorway, bend your affected arm 90 degrees to reach the doorknob. Keep your hand in place and rotate your body slowly in the opposite direction. Hold for 30 seconds. Relax and repeat.
  • Shoulder flexion stretch – Like child pose of Yoga –Kneel on the floor and keep the hands in the same spot, lower your buttocks towards your heels. This increases the degree of flexion at the shoulder joint.

Generally, it takes few months to recover from frozen shoulder. People may not show full recovery especially if they have high blood sugar. If not, it will take up to 18 months to recover. Good physiotherapy and proper exercises helps in total recovery.  While taking steroidal injections one need to think about the risk factors involved as it may cause complications later.  Surgery shoulder also has many consequences one need to think about. It may lead to muscle wasting and recurrent adhesions later. During manipulation of shoulder some patients may lose excess adhesion resulting in fracture bone – especially with elders this can happen.

IF you have pain in shoulder and have limited movement contact your doctor and seek suggestion before the condition advances.

References:

Image credit: yoga therapy – Image by SaraJobling from Pixabay  (Free for commercial use)


Author: Sumana Rao | Posted on:
« »
« »

Recommended for you

Managing Skin Condition In Winter Season

Managing Skin Condition In Winter Season

General tips: Chilly air and dry heat dry out the skin. Less sunlight can worsen symptoms. Hydration and barrier repair are critical during winter.

Eczema:

  • Use heavy-duty ointments.
  • Apply moisturizer immediately after bathing.
  • Take short, lukewarm showers.

Seborrheic Dermatitis:

  • Use oil-based moisturizers and scalp oils.
  • Keep indoor air moist with a humidifier.

Psoriasis:

  • Consider phototherapy.
  • Maintain vitamin D levels.
  • Moisturize multiple times a day.

Some of the year-round tips one should consider for keeping skin healthy are:

  • Avoid harsh soaps and hot water.
  • Stay hydrated.
  • Manage stress.
  • Track seasonal flare-up patterns.

Image credit: Image by Dimitris Vetsikas from Pixabay (Free to use under Pixabay content license, Published on May 4, 2018)


Author: Sumana Rao | Posted on: October 28, 2025
« »
« »

Recommended for you