


 Fusion
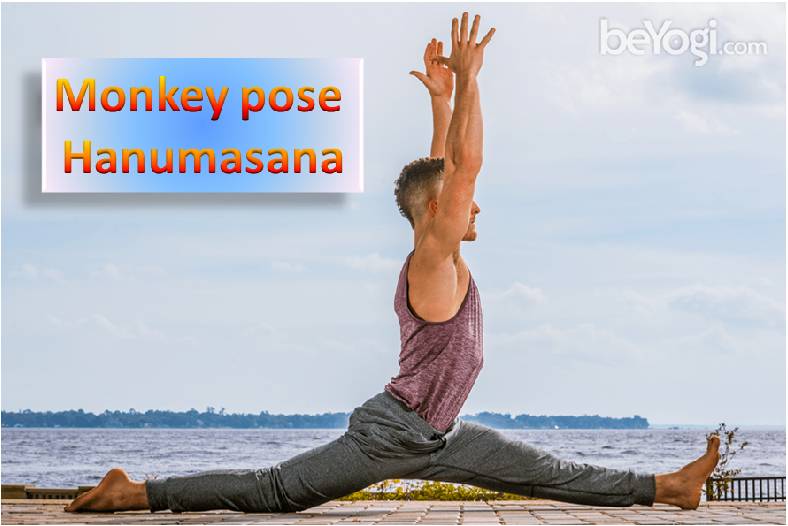
Hanumasana – Monkey pose
Ramayana’s Lord Hanuman’s pose commonly known as Hanumasana, Monkey pose / split pose. This yoga posture name is derived from the giant leap made by Lord Hanuman from Southernmost tip of India to Sri Lanka in search of Sita. This pose helps in practicing devotion, increases body flexibility and strength. This pose opens the hips and stretches muscles in the groin and hamstring region – Healthy Life.
Sanskrit: Hanumanasana (ha-new-mahn-AHS-anah)
Hanuman = having large jaws; a monkey chief and servant of Lord Rama in the Hindu epic Ramayana
BENEFITS
- Strengthens the abdominals and low spine
- Opens hamstrings and hip flexors
- Improves overall core strength
- Strengthens the quadriceps and glutes
- Stimulates the abdominal organ
CONTRAINDICATIONS
- Hip pathologies
- Low back pathologies (avoid rounding the lower spine)
- Groin, hamstring, or knee injuries
HOW TO
1. Start in Anjaneyasana (Low Lunge) with your right foot forward, back knee on the ground, and hands to the floor for support.
2. Inhale and extend your right knee in front of you with your heel on the floor. Rotate your thigh inwardly so your right knee faces upward, toward the sky.
3. Begin to slide your back knee behind you as you exhale. Slowly extend both legs into a full split by pressing through your right heel and the top of your left foot.
4. Inhale to keep the chest lifted, and draw the hands overhead.
5. Work toward keeping firm abdominals, maintaining length in your spine to reduce hyperextension, and squaring your hips toward the front of your mat.
6. Hold this pose for 30 seconds to a minute.
7. To exit, inhale and reach length into the spine. Exhale, place the hands on the floor, and lean forward. Then swing your back leg around to meet the front leg. Repeat on the opposite side.
MODIFY OR REPLACE
- Place a bolster under the pelvis and work toward extending the legs.
- Place yoga blocks beneath your hands to support the upper body and lengthen the spine.
SEQUENCING TIPS
Before:
- Paschimottanasana (Seated Forward Bend)
- Janu Sirsasana (Head to Knee pose)
- Upavistha Konasana (Wide-Angle Seated Forward Bend)
- Parsvottanasana (Pyramid pose)
After:
- Purvottanasana (Upward Plank)
- Paschimottanasana
TEACHING CUES
- Keep the spine lengthened through the torso and firm your abdominals.
- Squeeze your knees and reach through your toes to extend your legs.
- Draw the hands overhead and take your gaze to your fingertips.
- Be cautious of your low spine and hyperextension.
VARIATIONS
- Draw hands overhead or behind the back in Reverse Namaskar.
- Fold forward over the front leg.
WATCH OUT FOR
- Angling the back leg to the side
- Rounding the spine
- Tightness in the groin
This article and image are published with permission from www.beyogi.com
Author: HealthyLife | Posted on: June 1, 2017


Write a comment